Showing posts with label YouTube. Show all posts

Wednesday, November 16, 2022

Chocolate Cake with Aliases

 5 pics

It goes by many names, Chocolate Upside Down Cake, Chocolate Cobbler, Hot Water Chocolate Cake and others

Allegedly, this cake makes its own frosting, pudding, lava or whatever you want to call it. BUT! it's located at the bottom of the cake.  🔥Hot water poured on top of the batter  makes the pudding part. 

Being a YouTube fan  I consulted a couple of cooking channels I watch.  
Catherine's Plates 
and
Emmymade  

The Outcome
Mine looks like theirs.


Oh Yeah!!
How did it taste? Sooooo good! 
I added chopped walnuts and whipped topping before consuming.(not pictured. I devoured it too quickly.)

The recipe is easy though I'm not posting it.  I'll leave it to you to pick one of your choice.  I will say this; Follow the recipe to the letter. When it says, "Do not stir." Believe them! DO NOT STIR!!

That's it ***


Thursday, February 17, 2022

Cabbage Casserole


 I wanted another way to prepare cabbage. That's when I came across Cabbage Casserole. I watched several videos on Cabbage Casserole. After watching the one by Brenda Gant  I chose her method.  Brenda Gant is a  folksy woman. You'd think you were there in her kitchen  drinking a glass of sweet tea as she prepares the dish and tells interesting stories along with her cooking.  

This dish goes by other names and variations. Cabbage pie,  Cabbage and beef casserole, Cheesy Cabbage Casserole with Sausage. Some include tomatoes, mushrooms and other add-ons.  I wanted the simple one.

These are the ingredients.


Roughly chop the cabbage and place in a greased casserole dish.

Mix, mayonnaise, cream of chicken soup and butter
in a bowl and set it to the side.

In another bowl mix the cheese, crumbled crackers and melted butter.  This will be your topping.

Spread the chicken soup, mayo, butter mixture all over the
top of the cabbage.


Sprinkle the cheese, butter, cracker crumb topping on top of the creamy topping. Place in the oven on 350 degrees for about 45 minutes or until the casserole is bubbling and the topping is golden brown.


This casserole was delicious but, here and there it was a bit salty. I discovered that the most saltiness was in the crust.  I will make it again but, only after changing  the above mentioned things I noted in the recipe. 

That's it.***


Wednesday, March 31, 2021

That's How I Roll


I'd been wanting to try  decorating a roller shade using acrylic paint. The design would show only from the outside.  I consulted YouTube to watch several videos of a simple sunflower. One thing I did learn is that you can't mix the methods of different painters. I liked this one best by  DIY Crafty Creator


I wasn't expecting the calming glow from inside the bathroom, but I like it. And yet no one can see inside, even at night. ( I know because I tested it.😊)
Very pleased with the results.  
But, Wait There's More!


This is my back door.  I wanted a tree for this one. Consulted YouTube again. Settled on  Jay Lee Painting. Seems simple enough.


I am pleased with this result also.
I'll let you in on a secret. I couldn't get either shade to roll properly 😯but, I'll consult YouTube again and if that doesn't work out, I have another method in mind.  Still, I'm okay with the turn out.

That's it***

Thursday, September 17, 2020

Pears but no Partridge


When a friend called and asked if I like pears, I told her yes. I went over and I picked sooooo many pears off of her tree. This one tree bore like there was no next year. (maybe that tree knows something I don't) She'd already done a laundry basket of them and the tree was still loaded.
Clockwise: 
*Huge, heavy bag of pears 
*I separated them out and gave them to friends.  (not shown: the second batch of pears
  I picked)
*Ordered a peeler from Amazon. It looked like a toy but it worked great. 
I also ordered a corer from Amazon. Cores and slices.


A couple of weeks later I decided to use a dump cake method to make a pear cobbler. I watched about 5 different YouTube videos to view various perspectives. I consider a "cake" to have no juice. All of the recipes used a filling. I suppose it's called a dump cake because of the cake mix that's dumped on top of the filling to make a crust.
1. Gathering the items I'll need
2. Cooking and flavoring the frozen pears with just a small amount of water to get it started. As the  pears thawed they released their juices. (I noticed that none of the cooks added any
spices to their filling. ) But, I did. 😃SHOUT OUT to SIS for telling me this.
3. Put a little butter and powdered cake mix at the bottom of the greased pan. 
4. Placed the pear filling in each small loaf pan (about 2 cups), sprinkled the top of filling with cake mix. Placed pats of butter on top before baking

                                             The  Oven Fresh Results 


Cooked Pear Cobblers

I kept one for myself, tasted it and it was delicious.  Now I could distribute the rest to friends.


Top of the list on the receiving end  were  E.P. & L.P who have the pear tree. Thank you.

That's it ***


Tuesday, July 16, 2019

Mock Apple Pie 2019


slappedham.com
Ever had a burger in a can, beef fudge, mock apple pie, clear potato chip, or bologna cake?

There are many adventurous foodies out there. Two that come to mind are Andrew Zimmern and Mark Wiens


Recently I came across a Youtuber known as emmymadeinjapan.  To say she’s adventurous is an understatement.  She will cook and eat just about anything under the sun. She has done the recipes I mentioned above AND MORE.  Over a million people follow her on YouTube. I happened up on the channel and found myself hooked.  It was fascinating  to see what her next edible concoction  would be. She always gives her honest opinion and a review about the food. She includes  her successes and disasters.


When I saw the video about mock apple pie, it rung a bell because I made this same recipe in 2009 long before I’d seen her station.


Below is the recipe I used for mock apple pie.10 servings
My finished pie


Ingredients

2 cupswater
¾ cupgranulated sugar
2 teaspoonscream of tartar
30 Ritz Crackers
1 ready-to-use refrigerated pie crust (1/2 of 425-g pkg)
1 tablespoonlemon juice
1 teaspoonground cinnamon
25 Ritz Crackers (crushed, about 1 cup)
½ cupbrown sugar (packed)
½ teaspoonground cinnamon
⅓ cup
Directions
  • Heat oven to 400ºF.
Filling:
  • Mix water, granulated sugar and cream of tartar in large saucepan. Bring to boil on medium-high heat. 
  • Add crackers; simmer on medium-low heat 5 min., stirring occasionally.
  • Line 9-inch pie plate with crust as directed on package; fill with cracker mixture. Sprinkle with lemon juice and cinnamon.
Topping:
  • Combine all remaining ingredients and sprinkle over Filling.
  • Bake 15 min. Reduce oven temperature to 350°F; bake 20 min. or until golden brown. Cool.
non-hydrogenated margarine (melted)


(optional)  Top with whipped cream or ice cream if desired

The Outcome
The pie turned out great. I would not have known that the apples were crackers. The texture was more of an applesauce consistency. It was the right amount of sweetness and spices.   

It is not diet friendly or carb friendly or any other kind of friendly that involves eating
 healthy. Recently I learned that there are 400 calories a slice.


This post is an update from an earlier post on August 12, 2009. To read the original post click the dated link. 

That's it ***


Wednesday, September 21, 2016

Burlap On Stage


Burlap is back.
I got my inspiration from
Poppy Kosh
Manila Extract
and                           here

 I printed my own burlap coffee bag look by pulling up a graphic on the computer and printing it onto burlap. It's important to make sure all of the edges are taped down to avoid the ravels from the burlap yucking up the printer.
When was the last time you saw thread for 59cents? I took a chance using it.  By the way, it was a new spool that had never been opened. I thought it might be rotten after having it for so long but  it worked out fine.

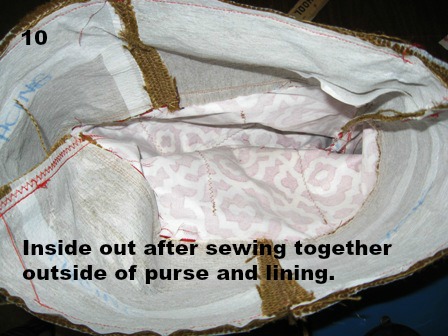
I ironed interfacing to the backs of all pieces
to give it some body.


I fused lace onto the two pockets so that they'd be easily seen inside the purse. I sewed one pocket on the front and back inside.


This is the part I was reluctant about.  I've only set grommets once and it was so long ago, I needed a refresher so I contacted YouTube. I don't know what I'd do without it. As stated before, no fabric stores so I got the grommets from Harbor Freight.     


Decided to make a purse charm
Also, I made a slide to go on the bag closing.
Ta Da ! All done.

Overall, This project was more trouble than it was worth. But, it was also a great learning experience.
THAT'S IT***