Showing posts with label oven. Show all posts

Tuesday, July 22, 2025

Oven Roasted Okra


I’m not a fan of boiled okra but, I do like fried okra. I’ve been oven roasting lots of vegetables lately and most give me the taste of charred or grilled .    It’s supposed to be healthier depending on how much oil or other fat used in the recipe. I’ve done carrots, broccoli, onions, squash, eggplant and cabbage. Some turned out great and others were a waste of time.


Air fryers have become popular as devices used to alleviate some of the calories and fats from many fried foods. At this time an air fryer is not in my future. I also, don’t want to relinquish kitchen counter real estate for the fryer.

Oven Roasted Okra (America’s Test Kitchen) 
 
Ingredients

1 pound fresh okra rinsed and dried

2 tsps. of oil

½ tsp. Salt


DIRECTIONS

Preheat oven to 425 degrees

1.      Remove okra caps. Split okra pods lengthwise.(for crispiness)

2     Place in a bowl. Add oil and salt. Toss thoroughly.

3.     Place pods seed side down on a baking sheet.

4.    Cover with foil and place in oven for 7 minutes*.

5.     After 7 minutes remove foil and place okra back in

     oven for another 7-10* minutes.

6.    Remove okra from oven.  Allow to cool on a cooling rack. You’ll notice that the okra has shrunk and that the flat side is a golden brown.

 ENJOY  your okra on its own or with a dipping sauce of your choice. Use as an appetizer or a side dish.


Blogger Note: * If using a shiny baking sheet, change cook times to 10 minutes each way. If using a browned baking sheet (what I used) cook for 7 minutes. Ovens may vary so check your okra halfway and make adjustments as necessary.


Blogger’s Opinions:  

v Washing and cutting were the most time consuming parts of the recipe.  

v I found the okra to be tasty but needing a little more seasoning. In the future I’ll be adding onion and garlic powder, salt, pepper, smoked paprika and a little more oil.

v There are other roasted okra recipes online that I may try in the future .


That's it***


Monday, May 5, 2025

Wacky Cake/Depression Era Cake aka Crazy Cake


Right now eggs are $5.++ a dozen because of bird flu.  For bakers and breakfast businesses that's a problem. 

I happened to come across a recipe that was popular during the Depression Era for a cake that uses no eggs or milk.  Here is the recipe:

Wacky Cake

Wacky cake is made without milk or eggs and is a moist, dark, and delicious chocolate cake. A brainchild of the Depression era when ingenious cooks developed a cake that could be made without expensive and scarce ingredients. Frost with your favorite icing.

Prep Time:
 
10 mins
Cook Time:
 
30 mins
Total Time:
 
40 mins
Servings:
 
10
Yield:
 
1 (8x8-inch) cake

Ingredients

  • 1 ½ cups all-purpose flour

  • 1 cup white sugar

  • 4 tablespoons unsweetened cocoa powder

  • 1 teaspoon baking soda

  • ½ teaspoon salt

  • 6 tablespoons vegetable oil

  • 1 tablespoon cider vinegar

  • 1 teaspoon vanilla extract

  • 1 cup water

Directions

  1. Preheat the oven to 350 degrees F (175 degrees C).

  2. Sift flour, sugar, cocoa powder, baking soda, and salt together in an 8x8-inch ungreased cake pan. Make 3 depressions in flour mixture; pour oil into one well, vinegar into second, and vanilla into third well. Pour water over all, then stir with a fork until well blended.

  3. Bake in the preheated oven until a toothpick inserted into the center comes out clean, 30 to 40 minutes. (allrecipes)


  4. 1


No mixing bowl needed. All ingredients can be mixed in the pan.


Here are some websites to view

Southern Living Wacky Cake

Italian Chef Wacky Cake. Eight Variations

Quaint Cooking

Sweet Little Bluebird -Vanilla Crazy Cake

That's it ***


Sunday, February 12, 2023

Mini Pot Pies

 A pot pie is a comforting food for me but, as with most comfort foods it is laden with calories.

I've been a subscriber to  One Dish Kitchen for some time. Joanie's   recipes for two have been helpful. She provides the directions for making small batches of huge recipes. 

However, the following recipe was on TikTok and I finessed it to fit my own needs. There are only four ingredients.  

As far as measurements and amounts, I have none. I did things "to taste."


The ramekins on the left are 4"x4" and the ones on the right are 5"x5". Each is no deeper than about 
1 1/2". 

I was sated with this small pie which I accompanied with steamed cabbage.  The additional pies were wrapped and placed in the freezer for future meals.

NOTE: Instead of frozen vegetables I will use canned next time. The veggies came out al dente`  since they were still frozen but, the pie was good just the same.  I had crescent roll dough left over. I allowed it to freeze and then placed it in a freezer bag🤞 for a future recipe. 

That's it 🍵🍵🍵


Wednesday, September 28, 2022

COOKING FOR ONE> maybe two APPLE COBBLER

 I've been trying out many of the recipes at One Dish Kitchen.  She has some great, conservative ways to make the most of food prep especially with the  high grocery prices. Sometimes you want just enough for you and another person (or  two for you).😄 The key is measurement conversion for more or less. In this case less. I'm not the best mathematician so my version of this One Dish Kitchen dump apple cobbler is my own.

Joanie, the author of One Dish Kitchen suggests using ramekins. She featured many styles and a link to where they could be bought if you choose to purchase online or in store.

 I bought these from Amazon.

This one's a winner and I'll be making it from time to time.🏆

Footnote: I also bought the silicone baking mats from Amazon. I'd been wanting one of these for cooking and crafting. This box came with two. I used the mat to save on clean up. It worked perfectly. Just a swipe with a damp cloth and the cooking juices were gone . I was left with a clean baking sheet underneath ready for the next project.👍


That's it ***


Wednesday, June 2, 2021

Sheet Pan Cooking

 Sheet pan cooking is a method of cooking an entire meal using one pan. Most often that pan is a large baking sheet. It's claim is that everything can be prepped and cooked at the same time. This leaves less mess and clean up after the meal. I've done oven roasted vegetables . They're easy prep, tasty and true enough there is less clean up

Today I prepared pork cutlets and baked carrots in Teriyaki sauce.

I prefer pork chops with the bone  but, these were on sale. My initial plan was to cut them in strips, place in the crock pot and add barbeque sauce. Even after this method I can still add barbeque sauce. 


I can't give you portions, measurements and time because I pretty much did this off the cuff. In addition to the carrots and pork cutlets I also prepared string beans and  potato salad...separately.😊
 Success!
That's it***


Wednesday, May 26, 2021

Collard Chips


I've seen  the recipes and I've seen the bagged ones,  but never have bought them or tasted them. 

Kale Chips     

How bad could it be?  I've baked broccoli and brussel sprouts. I liked the outcome of those two experiments and didn't want to be disappointed with kale.
BUT!
My friend E.P. has a small garden and offered me  some of her collard greens which I gladly accepted. They were young and tender. I decided to try Alton Brown's,  Baked Greens Chips I'd seen at the Food Network site. His recipe uses all sorts of "hearty" greens. Collards was on the list as a hearty green.


A. Wash and dry greens thoroughly
B. Lay parchment paper on a baking sheet.
C. Tear greens into 2 inch pieces and lightly coat with olive oil and         salt. ( I chose to tear  the greens from the stems and save them.)            
D. After following the directions and baking them, I allowed them
     to cool. I tried to eat them but they disintegrated. 😲 
No texture or strength. The consistency of paper after it turns to
     ashes. I tried a second batch and tweaked the cooking time. Same
     thing. 
CONCLUSION: This may have worked had the collard green leaves 
     been thicker and more mature. 
     
                      I AM NOT TO BE DEFEATED !!!!
     
I have those tender stems. So, what did I do?

It wasn't a complete loss. 
That's it ***

Wednesday, March 3, 2021

Here a Chickpea, there a Chickpea

 Will they taste similar to roasted peanuts?😲


I didn't like the outcome. They were harder than peanuts. I won't be using this recipe again.

That's it***


Sunday, February 28, 2021

Roasting the Greens

 I've discovered that I like the way a lot of traditionally boiled vegetables taste even better roasted. Not only that they're easy to prepare. 

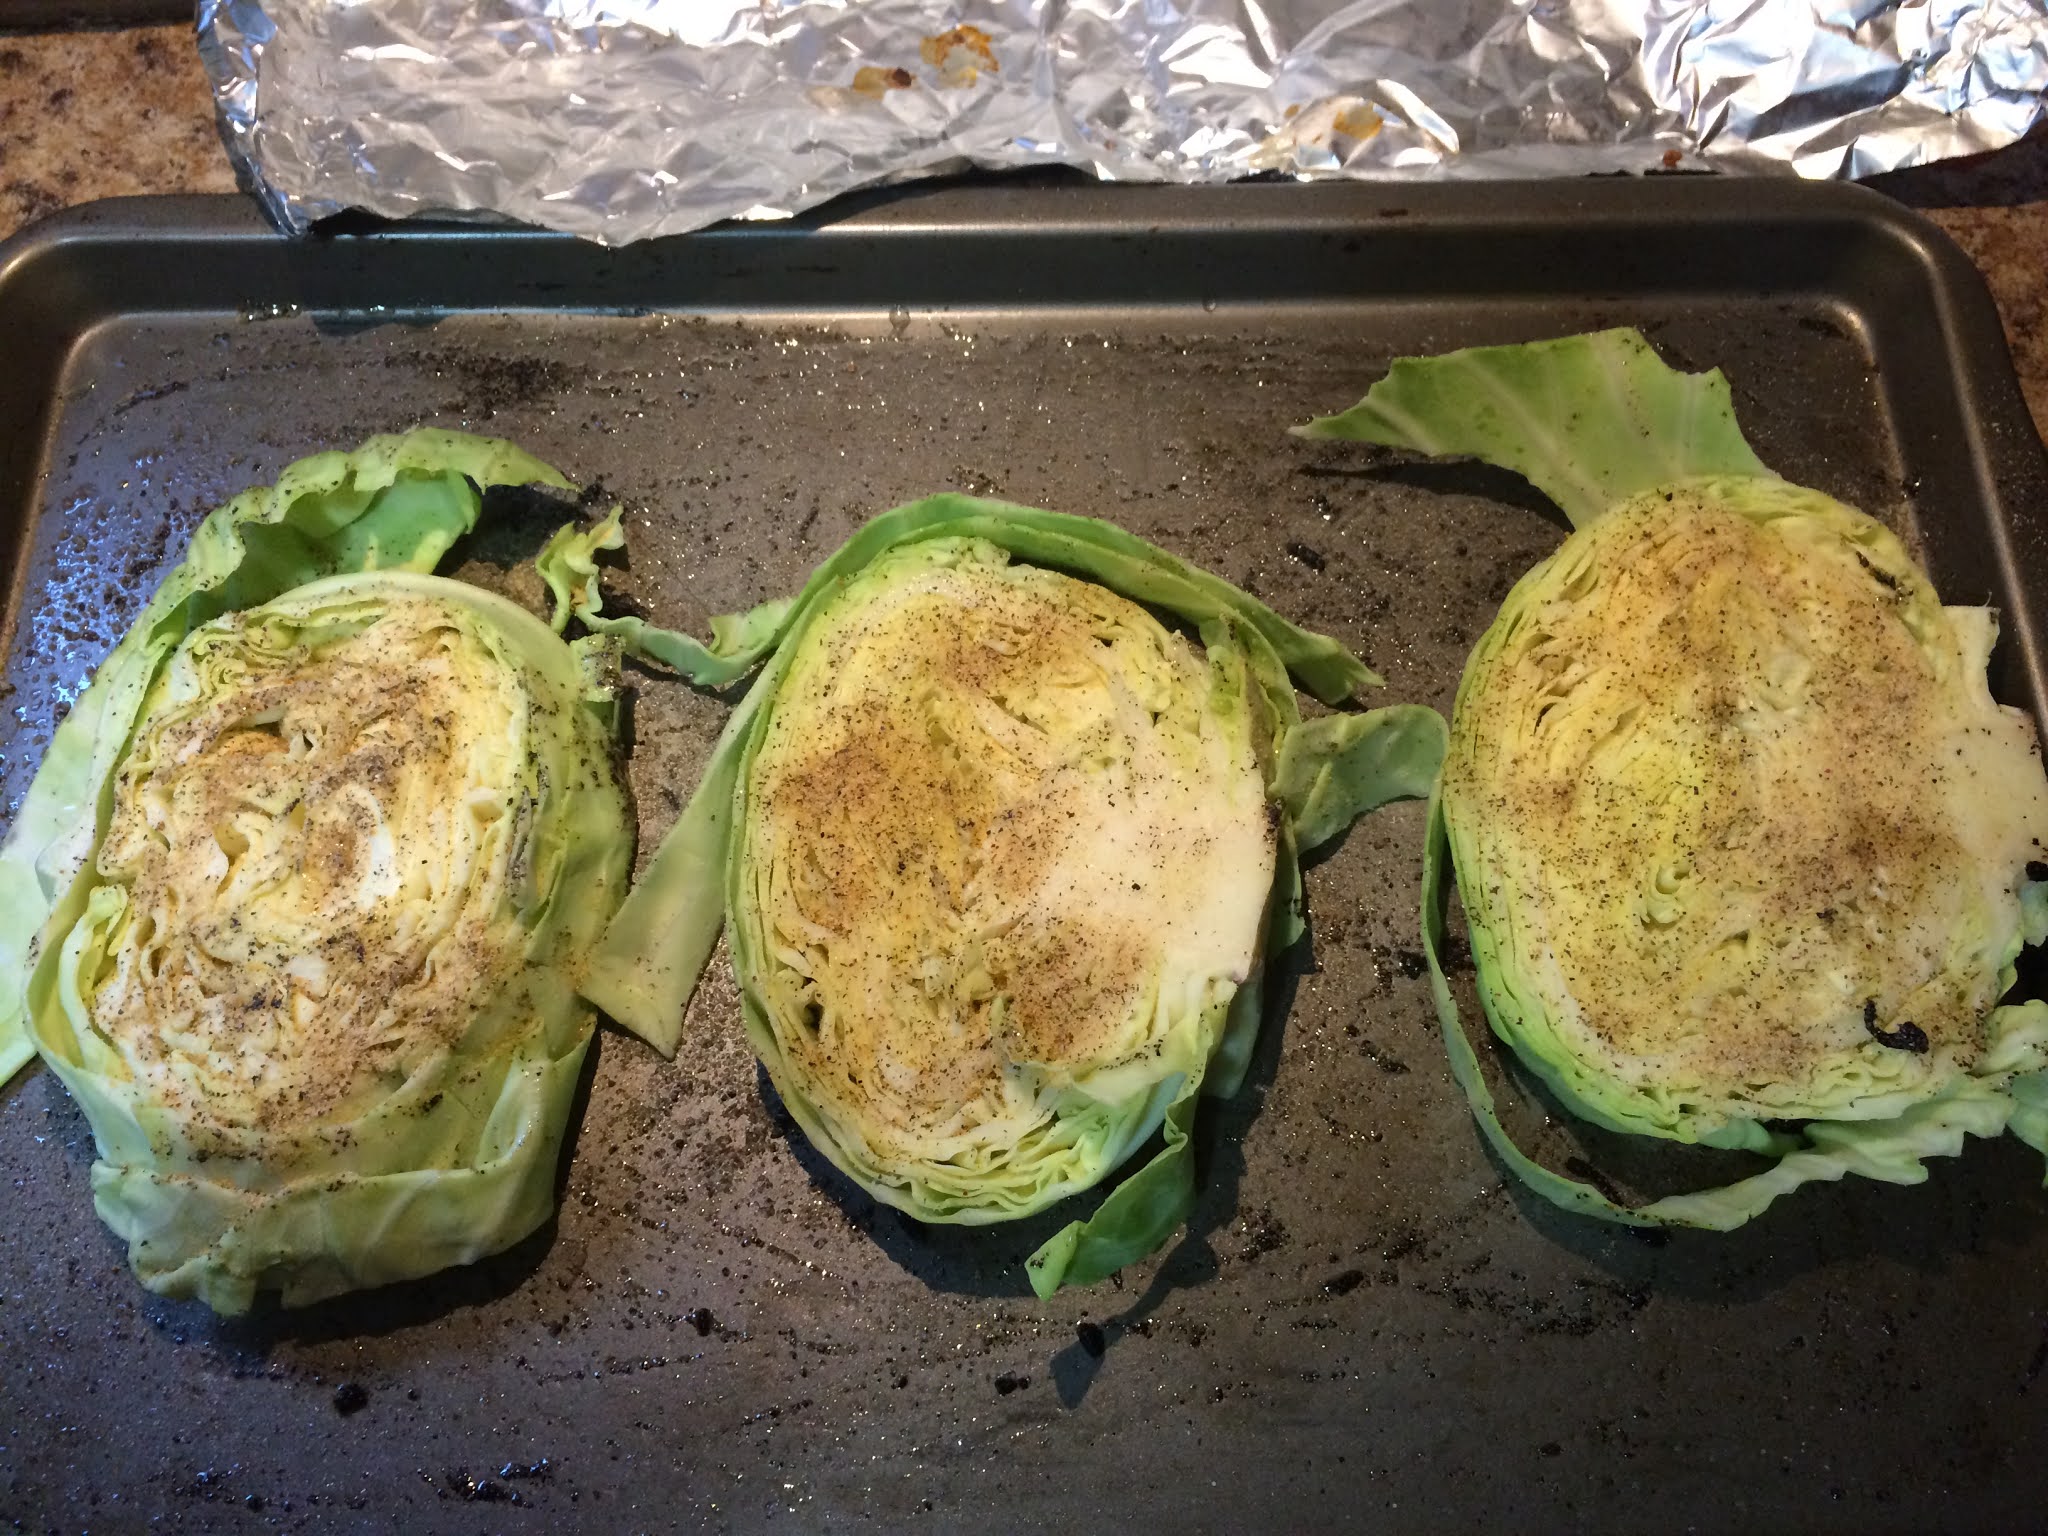
I recently cooked cabbage steaks. There is no meat involved unless you want there to be. I'm assuming they're called cabbage steaks because they're cut in thick hunks and laid flat.  I consulted recipes at  Dinner then dessert and also Allrecipes.   

Then I used my own method.

1. Oil a baking sheet with olive oil. NOTE: you may use a cooking spray if you like.

2. Remove the outside leaves from a head of cabbage. Place the cabbage on its core and slice downward into 1/2-1 inch "steaks."


3. Season each side of the vegetable with salt pepper and any other spices you desire. I also sprinkled with garlic powder. Lay the steaks on the baking pan and sprinkle a little more olive oil on top.


4. Cover with foil and place in a 350 degree oven for approximately 30 minutes. Since I only did three, I checked on them after 20 minutes. Wanting a nice char, I turned the steaks over, recovered them and allowed them to continue cooking for 10 more minutes. 


5. Allow to cool a bit. Transfer to a plate using two utensils to keep the shape.

Those charred bits are full of flavor. Adding a little blue cheese or ranch dressing on the side as a dipper makes it even more delicious.

It can be eaten by cutting with a knife and fork.

                                    OR,

if you're by yourself,  unfurl by strips, dip in sauce ,throw your head back and drop the strips in your mouth. Deeelicious!

                                           *****

I've also roasted broccoli  and brussel sprouts frozen and fresh. The frozen broccoli and brussel sprouts shrink more while roasting than the fresh . Still I'm pleased with the taste.


You may remember the brussel sprouts from

Oven Roasted Parmesan Brussel Sprouts. 


I've yet to try cauliflower since it isn't one of my favorites, but I'll give it another go.

THAT'S IT***


Thursday, September 17, 2020

Pears but no Partridge


When a friend called and asked if I like pears, I told her yes. I went over and I picked sooooo many pears off of her tree. This one tree bore like there was no next year. (maybe that tree knows something I don't) She'd already done a laundry basket of them and the tree was still loaded.
Clockwise: 
*Huge, heavy bag of pears 
*I separated them out and gave them to friends.  (not shown: the second batch of pears
  I picked)
*Ordered a peeler from Amazon. It looked like a toy but it worked great. 
I also ordered a corer from Amazon. Cores and slices.


A couple of weeks later I decided to use a dump cake method to make a pear cobbler. I watched about 5 different YouTube videos to view various perspectives. I consider a "cake" to have no juice. All of the recipes used a filling. I suppose it's called a dump cake because of the cake mix that's dumped on top of the filling to make a crust.
1. Gathering the items I'll need
2. Cooking and flavoring the frozen pears with just a small amount of water to get it started. As the  pears thawed they released their juices. (I noticed that none of the cooks added any
spices to their filling. ) But, I did. 😃SHOUT OUT to SIS for telling me this.
3. Put a little butter and powdered cake mix at the bottom of the greased pan. 
4. Placed the pear filling in each small loaf pan (about 2 cups), sprinkled the top of filling with cake mix. Placed pats of butter on top before baking

                                             The  Oven Fresh Results 


Cooked Pear Cobblers

I kept one for myself, tasted it and it was delicious.  Now I could distribute the rest to friends.


Top of the list on the receiving end  were  E.P. & L.P who have the pear tree. Thank you.

That's it ***


Wednesday, March 4, 2020

Low Carb Cauliflower Pizza Crust


Low Carb Cauliflower Pizza Crust (copied from the -lowcarb-diet.com)

Ingredients

  • 1 large head cauliflower
  • 1 egg
  • 1 cup shredded cheese
  • 2 teaspoons oregano
  • 2 teaspoons basil
  • 3 oz. tomato sauce I used Hunt’s Tomato Sauce

Special Equipment


Instructions

  1. Preheat oven to 450 and line a pizza pan with parchment paper.
  2. In large bowl, rice (grate) the head of cauliflower with a grater or food processor.
  3. Microwave riced cauliflower for 5 minutes and let cool for at least 5 minutes.
  4. Once cooled, wrap cauliflower in a thin kitchen towel and wring moisture from cauliflower.
  5. Mix egg, ½ cup of cheese, 2 teaspoons of oregano and 2 teaspoons of dried basil with riced cauliflower.
  6. Pat cauliflower mix on lined pizza pan and place into oven for 25 minutes.
  7. Spoon tomato sauce, sprinkle ½ cup cheese, and add desired toppings. Place back into oven and cook for 5-8 minutes or until toppings have melted.

Recipe Notes

Serving size: 1 Slice (Entire pizza cut into 8 slices)
Protein 5.34g, Carbs 3.45g, Fiber 1.43g -- NET CARBS: 2.02g
                                            xxxxx
The recipe didn't say what type of cheese to use. My Italian friends have taught me to
use only Mozzarella cheese. Orange cheese is a No, no!👆


Mix in the seasonings and other ingredients.


FAILED. Not what I expected. Obviously.


Though I followed the directions, here's what I'd do differently next time.
1. Add a little salt to the cauliflower mixture.
2. I wouldn't spread the mixture as thin as I did.
3. Reduce the cooking time and/or watch the crust as it cooks.

Though this is a FAIL⊗, I'll be trying it again in the future.
That's it***

next time: Keto Ice Cream