Showing posts with label sugar. Show all posts

Monday, May 5, 2025

Wacky Cake/Depression Era Cake aka Crazy Cake


Right now eggs are $5.++ a dozen because of bird flu.  For bakers and breakfast businesses that's a problem. 

I happened to come across a recipe that was popular during the Depression Era for a cake that uses no eggs or milk.  Here is the recipe:

Wacky Cake

Wacky cake is made without milk or eggs and is a moist, dark, and delicious chocolate cake. A brainchild of the Depression era when ingenious cooks developed a cake that could be made without expensive and scarce ingredients. Frost with your favorite icing.

Prep Time:
 
10 mins
Cook Time:
 
30 mins
Total Time:
 
40 mins
Servings:
 
10
Yield:
 
1 (8x8-inch) cake

Ingredients

  • 1 ½ cups all-purpose flour

  • 1 cup white sugar

  • 4 tablespoons unsweetened cocoa powder

  • 1 teaspoon baking soda

  • ½ teaspoon salt

  • 6 tablespoons vegetable oil

  • 1 tablespoon cider vinegar

  • 1 teaspoon vanilla extract

  • 1 cup water

Directions

  1. Preheat the oven to 350 degrees F (175 degrees C).

  2. Sift flour, sugar, cocoa powder, baking soda, and salt together in an 8x8-inch ungreased cake pan. Make 3 depressions in flour mixture; pour oil into one well, vinegar into second, and vanilla into third well. Pour water over all, then stir with a fork until well blended.

  3. Bake in the preheated oven until a toothpick inserted into the center comes out clean, 30 to 40 minutes. (allrecipes)


  4. 1


No mixing bowl needed. All ingredients can be mixed in the pan.


Here are some websites to view

Southern Living Wacky Cake

Italian Chef Wacky Cake. Eight Variations

Quaint Cooking

Sweet Little Bluebird -Vanilla Crazy Cake

That's it ***


Wednesday, November 16, 2022

Chocolate Cake with Aliases

 5 pics

It goes by many names, Chocolate Upside Down Cake, Chocolate Cobbler, Hot Water Chocolate Cake and others

Allegedly, this cake makes its own frosting, pudding, lava or whatever you want to call it. BUT! it's located at the bottom of the cake.  🔥Hot water poured on top of the batter  makes the pudding part. 

Being a YouTube fan  I consulted a couple of cooking channels I watch.  
Catherine's Plates 
and
Emmymade  

The Outcome
Mine looks like theirs.


Oh Yeah!!
How did it taste? Sooooo good! 
I added chopped walnuts and whipped topping before consuming.(not pictured. I devoured it too quickly.)

The recipe is easy though I'm not posting it.  I'll leave it to you to pick one of your choice.  I will say this; Follow the recipe to the letter. When it says, "Do not stir." Believe them! DO NOT STIR!!

That's it ***


Wednesday, September 28, 2022

COOKING FOR ONE> maybe two APPLE COBBLER

 I've been trying out many of the recipes at One Dish Kitchen.  She has some great, conservative ways to make the most of food prep especially with the  high grocery prices. Sometimes you want just enough for you and another person (or  two for you).😄 The key is measurement conversion for more or less. In this case less. I'm not the best mathematician so my version of this One Dish Kitchen dump apple cobbler is my own.

Joanie, the author of One Dish Kitchen suggests using ramekins. She featured many styles and a link to where they could be bought if you choose to purchase online or in store.

 I bought these from Amazon.

This one's a winner and I'll be making it from time to time.🏆

Footnote: I also bought the silicone baking mats from Amazon. I'd been wanting one of these for cooking and crafting. This box came with two. I used the mat to save on clean up. It worked perfectly. Just a swipe with a damp cloth and the cooking juices were gone . I was left with a clean baking sheet underneath ready for the next project.👍


That's it ***


Tuesday, July 16, 2013

Here We Go Again- More TOMATOES


TOMATOES JAMMIN'

There's nothing like the taste of fresh produce.  I usually get mine at markets that cater to fresh, usually a local Farmer's Market .


 My neighbor gave me a bag of  fresh yellow squash. Also in the bag was a large green tomato. Since my experience cooking fried green tomatoes has not been to my liking I searched for another use for the green tomato. Since I like to try the strange and quirky (tomato ice cream * see post below this one) I found a recipe for Easy Green Tomato JamEasy  was the deciding feature for me.


After chopping and measuring my tomato, I was ¾ of a cup shy of the two cups called for in the recipe. I searched online again to see if there was a recipe that encompassed red and green tomatoes. I came across another recipe for Red Tomato Jam that was almost identical the Green Tomato Jam recipe.
I found my recipes at  Cooks.com


Easy Green Tomato Jam


2 cups chopped green tomatoes and juice (I used a mixture of red and green tomatoes)

2 cups sugar

1 (3oz.) box strawberry jello ( I used mango flavored Jello)

Boil tomatoes and sugar about 12 minutes.

Remove from heat and add Jello. Mix well, untill Jello is melted. Put in ½ pint jars and refrigerate.

One of the good things about this recipe is that it's refrigerated and since I'm making a small quantity there's no need to sterilize the jars nor process the jars in a water bath after they've been filled. Other recipes however did indicate taking the product through the canning method if you're planning to store them for a time.


Tomatoes and sugar cooking.


Adding the mango Jello to tomatoes and sugar mixture.


Sterilized pint jars filled with tomato jam. Leave some head space.


Jarred tomato jam  with lids. Will place in fridge to set/congeal. Since this is a refrigerator jam  and there are only two pints a water bath to seal is not necessary.


The final product after a short period of allowing it to congeal a little. (I was anxious to taste it) I have it paired with toasted tortillas that I have broken  into manageable pieces.   I rarely eat sliced bread and cornbread and the tortillas were in the freezer left from an earlier cooking project.
It was very sweet. Too sweet for my taste. The jam  became firmer by the next day. I have paired the jam  with cooked greens and some baked  meats.    The sweetness wasn't as evident this way and was more palatable.
THAT'S  IT***

Tuesday, July 2, 2013

Tomato Ice Cream

TOMATO ICE CREAM
If tomatoes are in the fruit family then they should be ice cream worthy.
tomato ice cream
With there usually being an abundance of tomatoes this time of year experimentation is on the menu. Unique confections abound. Research a few of the flavors Ben and Jerry have concocted. Not everything is a keeper.

Think you've discovered something? Get online and you'll discover you haven't. So it was with the tomato ice cream. I surfed the NET to find a few ideas as to how to go about this unusual flavor.  There weren't that many. Most involved cooking with eggs and so forth. It wasn't something I wanted to attempt. Easy Peasy, that's me. I  decided on a recipe I've used before.

 It was taken from  August 4, 2004 edition of Southern Living magazine. It was developed by Lera Townley of Roanoke, Alabama. Her daughter Wanda Stephens was an Office Manager @ Southern Living. Some of this background info may have changed by now. Below are the ingredients for their vanilla based ice cream.

No-Cook Vanilla Ice Cream
   1 (14 oz) can sweetened condensed milk
   1 (5oz.) can evaporated milk
   2 TBSP sugar
   2 tsp  vanilla
   2 cups whole milk
   ******************************************************
TOMATO ICE CREAM
2 cups seeded tomato puree. (I used 3 med./large fresh tomatoes to make the puree.)

1 (14 oz) can sweetened condensed milk

1 (5oz.) can evaporated milk
2 TBSP sugar
2 tsp vanilla
2 cups whole  Almond milk

BLANCH tomatoes, peel, seed, quarter and puree in blender or food processor. Set aside.


Drop tomatoes in boiling water for about 30-45 seconds. Remove and immediately place in cold water to stop the cooking.


I chose to score the tomatoes on top and bottom to make sure the skin came off easily and it did.


I placed the puree in the fridge so that it could cool even more.

I used a large pitcher for mixing the ingredients. Easier to pour into the ice cream container thingy. 


BC-Before churning

AC-After Churning
The ice cream needs to be cured either in the fridge freezer or packed in the ice cream freezer.

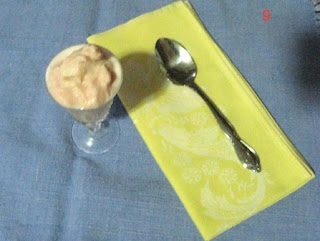
The finished results. It's such a pretty color.

Here you see a sample of the finished results. (That's an air bubble you see not a piece of tomato.)
You're wondering how it tasted. Tastes great.   I was  telling a friend about it. She  hasn't tried it but concluded that as long as you're using sugar, it's got to taste good. NoLa, you're right.
THAT'S IT***