Showing posts with label gold. Show all posts

Saturday, April 20, 2019

Purse charms/Key rings/ Lanyard


 G. J. and I were in charge of our April Red Hat event. The chapter  usually has a "lovely parting gift" for each person that attends. I told my  event buddy that I'd been working on these, showed  her a sample and we both decided that they would be fine as a gift.

At first it was going to be a pendant on a gold or silver chain. Then I realized some are sensitive to various metals. I didn't want to use ribbon or cord so I had to rethink the project.
💡
A purse charm would be away from the body and it would be less prone to cause sensitivity.

     I painted one side of wooden circles purple for Red Hatters and pink for Pink Hatters. Let it dry. I drilled a hole at the top of each one.
 I painted the back side some form of gold or silver. A  fellow crafter had given me strands of pearls and strands of gold beads which were perfect for this project.  With the beads being on a strand it was much easier to wrap them around the glass bubble picture of each one and slowly pull the string after the beads were in place. I used E-6000 glue for all adherences. 
Pearls in place, Gold beads in place, names on the back, etc. Let it dry.


Now it was time to  do individual beading to make the dangly, thingies that would hang off of the purse charm.
Yep, you're seeing it right. I used an empty egg crate to separate my beads. 

The danglies were then attached to the blank key chains which I purchased from Amazon. 

SIDEBAR: I noticed that some of the key chains had a straight piece of wire in between the groove where the keys go.  Not knowing what it was, I inquired and discovered that it was there to help separate the clip so that the keys could slide on easier. BTW- A staple remover works well also when separating to add keys. No more ruined manicures.

You'll see the results of the dangly, thingies here and below.

The fronts and backs were all finished with at least three coats of Triple Thick. This product gives a glassy, glossy appearance to projects and helps protect them.


They needed some type of packaging and personalization so  I used card stock and personalized everyone's name on their individual purse charm.
This was a fun project and turned out just the way I wanted it to.

That's it ***


Wednesday, March 7, 2018

Shoe Tree Doorstop 10 pics

The finished product


The inspiration. Found on Pinterest. Sponsored by Etsy
Found this one, lonely, wooden shoe tree


These were the colors I used, distressing between layers. 
Top layer of gold metallic and then lightly distressing again

Old jewelry used for decoration
More left over baubles glued on. You can see the colors coming through and also where I forgot to remove tape. Oops!
Close up of the top using pony beads and other plastic beads. Painted vines and stems.
Side view. Black felt glued to the sole to prevent scratch marks on the floor
Again, the finished product. Ta da🎶🎶
That's it


Sunday, February 21, 2016

Thank You Card Earrings

I've just made my first pair of earrings. At one time I was only doing necklaces but then I decided to branch out now that I'm on a FACEBOOK fast until March 24th.

It started with me getting a thank you card that I really had not expected. It was beautiful and the sentiments expressed were the same.

1. I had balsa wood ovals in 3 sizes. After tracing around the paper, I cut them out and put them to the side.
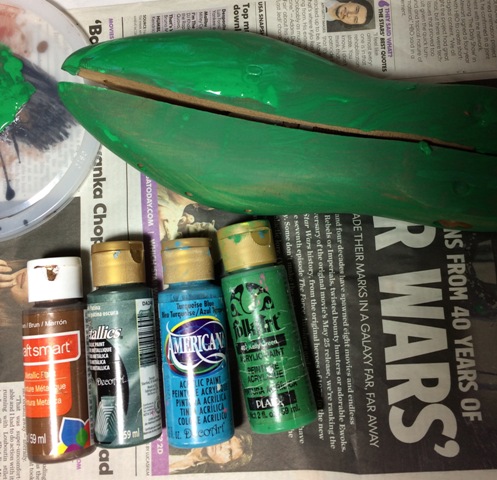
2. I painted the largest ovals on both sides with the pea green acrylic paint you see in the picture. Since the medium and small ovals would only be seen on one side, I only painted one side.
3. After the paint dried, I glued the paper on top of the painted wood.
While I was at it, I took a map pin and pressed holes in the tops of the larger ovals prepping them for earring backs later.
I wanted a rough edging of metallic gold around the edges. I mixed the paint with glue to insure that the paper would stay down.
After the glue dried, I gave them 2 coats of  decoupage clear coating on the front and back.
 I have to admit that I used a gold nail polish on top of the green acrylic paint and then a gold metallic acrylic paint on top of that. I didn't know how it would turn out but I like the texture when it was dry.
 I had a few rhinestones left over from another project and used those to give it a little more bling.
I'm pleased with the way they turned out. I may make a pendant for a necklace.
BUT WAIT, THAT'S NOT ALL !
I just couldn't leave well enough alone.
Seeing the purplish water color stain, I ventured into making a cylindrical pair of earrings out of the paper.
It began with painting one of my business cards with purple metallic polish on both sides. I wanted a two tone look. You can see where I've cut the purple and green paper from the thank you card.

I  glued the card stock over the painted purple card sandwich style and let it dry. Then I cut it into two slender pieces just as you see in the picture.
I wanted beads at the stop of the earring and something  dangling at the bottom.
I went overboard and this is what I got.
 It was resting on my shoulders in a bent formation. It was more than I wanted to wear. I had to decide what I'd do. 
In the end I kept the top purple part and fit it with earring backs.


The pear and leaf dangles, I put back in my stash to use for future projects.

 WHAT HAPPENED TO THE PAPER ?
I'd spent a lot of  time on the paper, painting, measuring, cutting, top coating.  It was hard letting go and I couldn't think of anything else I could use it for. After much hesitation, it ended up in the trash.  Sometimes you just have to let go and learn from your mistakes.
THAT'S IT***