Showing posts with label olive oil. Show all posts

Wednesday, February 22, 2023

Roasted Cauliflower ,Stems and Greens


We all know that grocery prices have skyrocketed. This small head of cauliflower was $2.69 at ALDI.
 

After removing the core, leaves and stems  and saving them, I broke the cauliflower into florets trying to keep them about the same size.  

I tossed the florets in olive oil seasoning with Mrs. Dash, paprika, basil and  garlic powder. Regular salt and pepper will do the trick but, I'm trying to cut back on my sodium intake.

Placing the florets on a heat proof mat sprayed with cooking spray, I placed them in the oven on 400 degrees for about 20-25 minutes. I checked periodically to make sure they weren't burned.
I removed them from the oven, waited for them to cool off enough to eat and dug in. OOOO-delicious. As you can see there weren't many. That browning on the tips is not burning. It adds so much flavor.  I dipped 3 of them  in a tiny bit of Ranch Dressing just to see how it would taste. OOOO-delicious again. 

Next time I'll break them into smaller florets. That way they'll cook faster with even deeper flavor. It'll also appear as if I have more than I do. 😀

But, wait. There's more!
I wanted to know if the leaves and stems were edible. I Googled "cauliflower leaves and stems".

Yes, they are. After all I did pay for the w-h-o-l-e thing and I want to get my $2.69 worth.  I found numerous recipes online. They can be used in soups, stir fried, stocks, salads and even made into cole slaw.

That's what I did with the first cauliflower. The stems can be a little tough but if you peel them the inside is perfect. BUT!, I didn't peel them. After washing the greens and stems thoroughly, I finely chopped everything so that it would be more digestible.

 I put these fixings in a bowl, added mayo,  sweet pickle relish, a little cheese for color along with seasonings of choice and began my consumption.  It was good enough for me to want to make coleslaw with it again. Some of the recipes showed additional ingredients but I preferred to keep it simple. 

I stir fried the next batch along with white onion and seasonings. I added cooked chicken and a little sweet and sour sauce.  It was tasty. 

I didn't add a lot of "stuff" to my recipes since it was my first time trying it out. I didn't want to be disappointed if it didn't turn out to my liking and I would have wasted the additional ingredients for nothing.


That's it ***


Wednesday, May 26, 2021

Collard Chips


I've seen  the recipes and I've seen the bagged ones,  but never have bought them or tasted them. 

Kale Chips     

How bad could it be?  I've baked broccoli and brussel sprouts. I liked the outcome of those two experiments and didn't want to be disappointed with kale.
BUT!
My friend E.P. has a small garden and offered me  some of her collard greens which I gladly accepted. They were young and tender. I decided to try Alton Brown'sBaked Greens Chips I'd seen at the Food Network site. His recipe uses all sorts of "hearty" greens. Collards was on the list as a hearty green.


A. Wash and dry greens thoroughly
B. Lay parchment paper on a baking sheet.
C. Tear greens into 2 inch pieces and lightly coat with olive oil and         salt. ( I chose to tear  the greens from the stems and save them.)            
D. After following the directions and baking them, I allowed them
     to cool. I tried to eat them but they disintegrated. 😲 
No texture or strength. The consistency of paper after it turns to
     ashes. I tried a second batch and tweaked the cooking time. Same
     thing. 
CONCLUSION: This may have worked had the collard green leaves 
     been thicker and more mature. 
     
                      I AM NOT TO BE DEFEATED !!!!
     
I have those tender stems. So, what did I do?

It wasn't a complete loss. 
That's it ***

Wednesday, March 3, 2021

Here a Chickpea, there a Chickpea

 Will they taste similar to roasted peanuts?😲


I didn't like the outcome. They were harder than peanuts. I won't be using this recipe again.

That's it***


Sunday, February 28, 2021

Roasting the Greens

 I've discovered that I like the way a lot of traditionally boiled vegetables taste even better roasted. Not only that they're easy to prepare. 

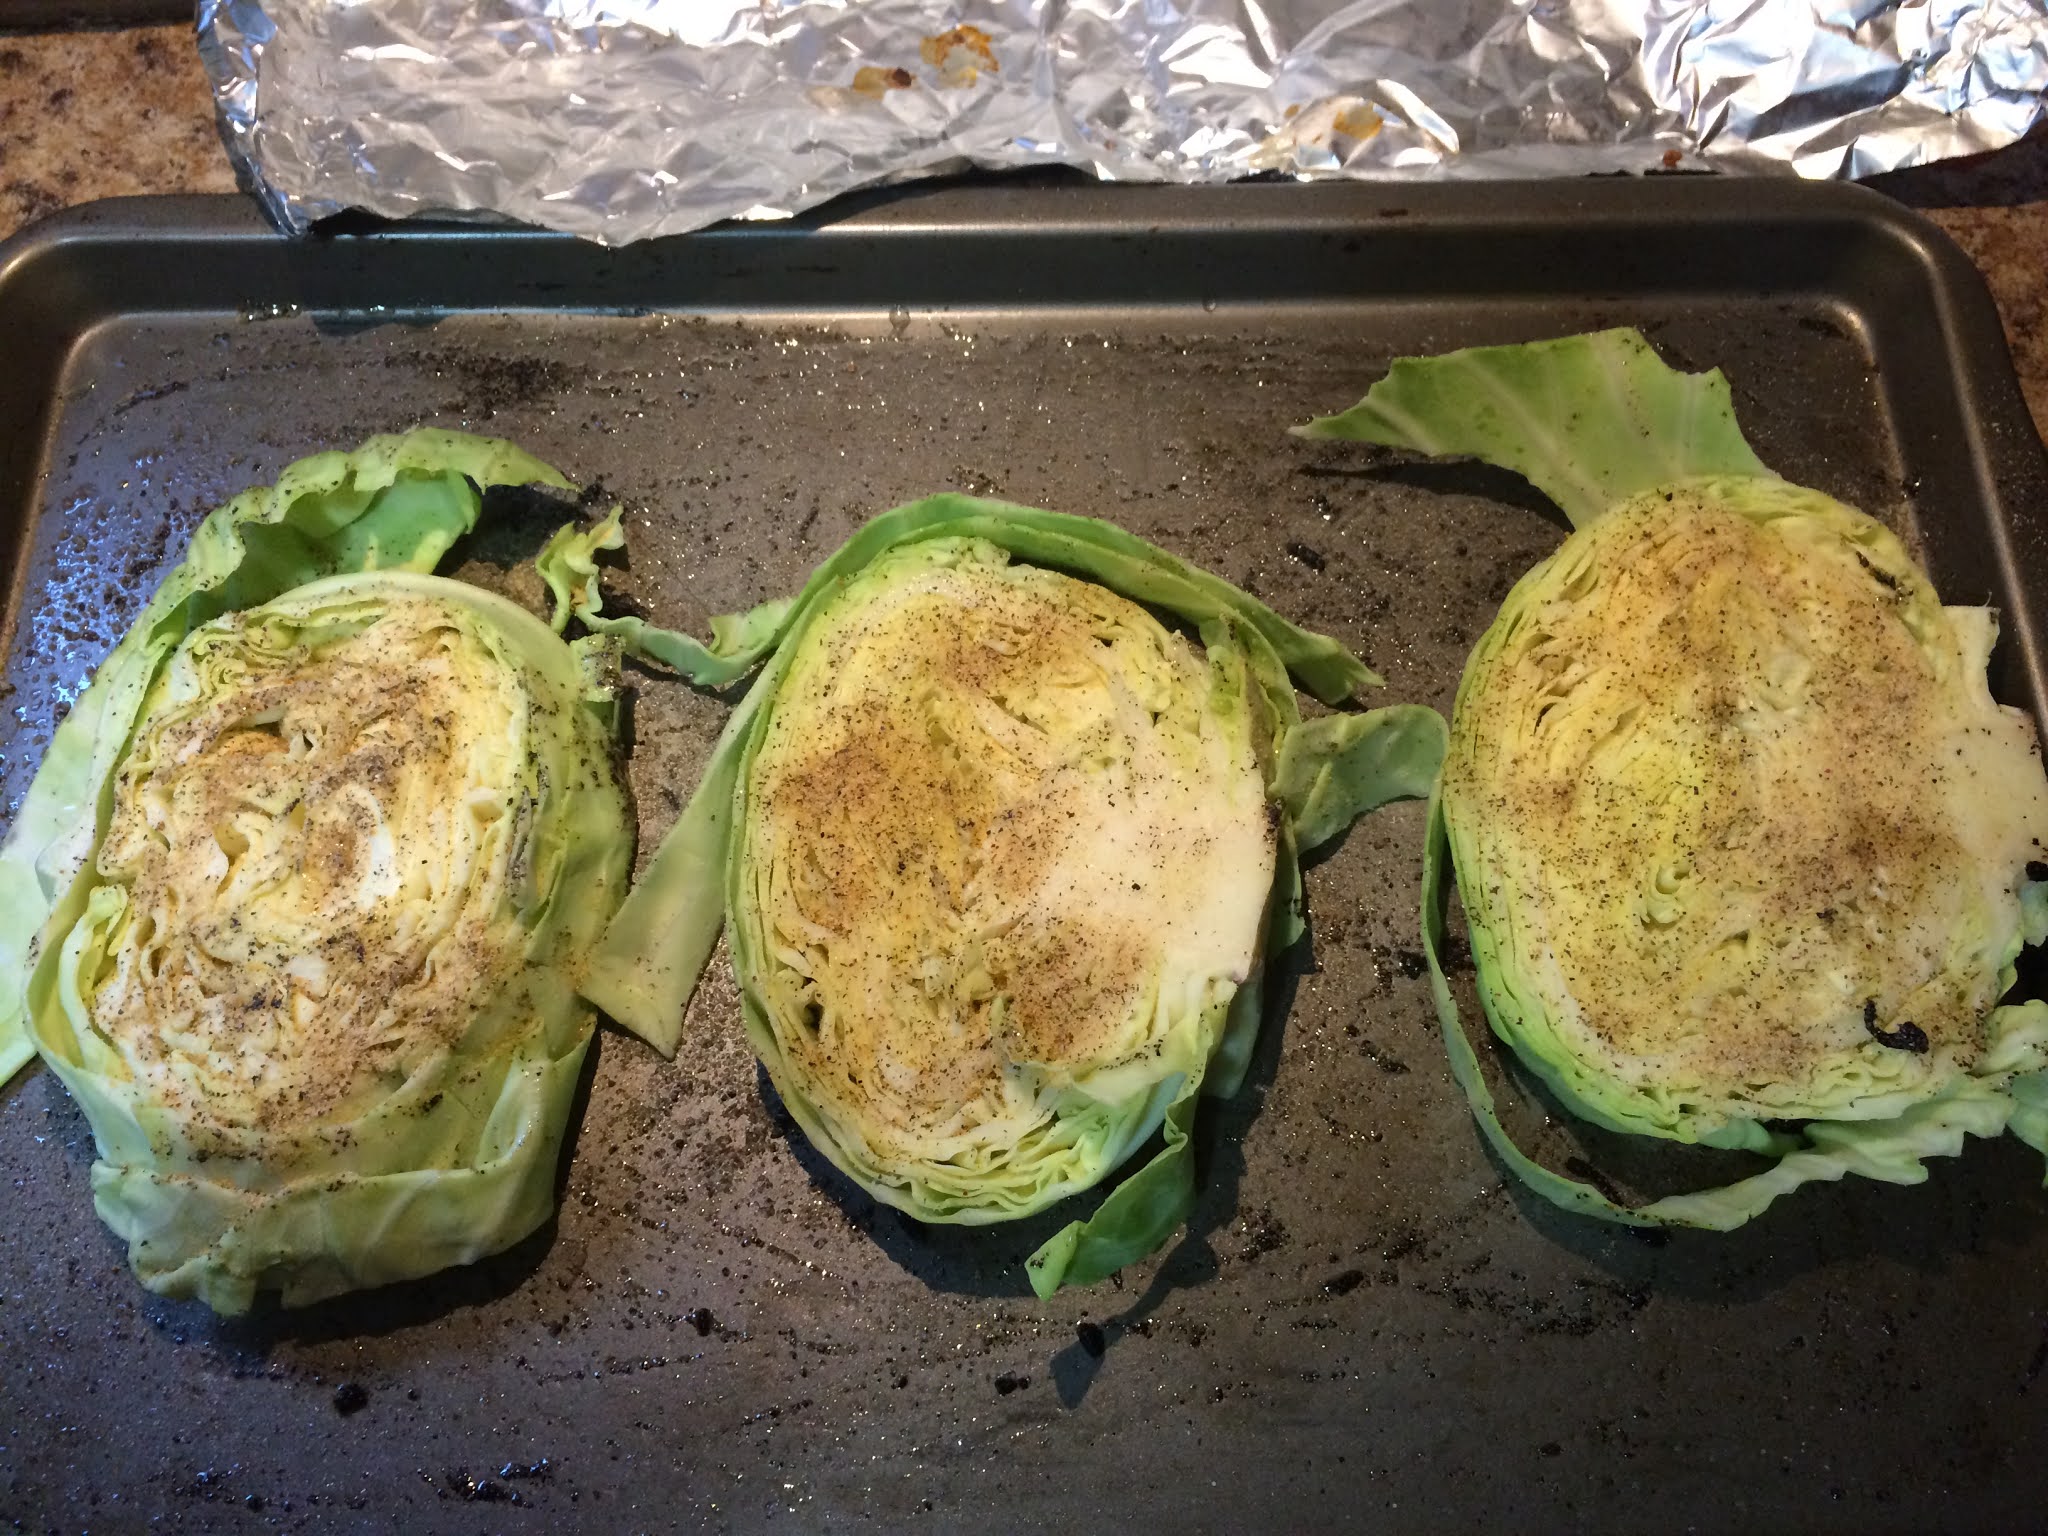
I recently cooked cabbage steaks. There is no meat involved unless you want there to be. I'm assuming they're called cabbage steaks because they're cut in thick hunks and laid flat.  I consulted recipes at  Dinner then dessert and also Allrecipes.   

Then I used my own method.

1. Oil a baking sheet with olive oil. NOTE: you may use a cooking spray if you like.

2. Remove the outside leaves from a head of cabbage. Place the cabbage on its core and slice downward into 1/2-1 inch "steaks."


3. Season each side of the vegetable with salt pepper and any other spices you desire. I also sprinkled with garlic powder. Lay the steaks on the baking pan and sprinkle a little more olive oil on top.


4. Cover with foil and place in a 350 degree oven for approximately 30 minutes. Since I only did three, I checked on them after 20 minutes. Wanting a nice char, I turned the steaks over, recovered them and allowed them to continue cooking for 10 more minutes. 


5. Allow to cool a bit. Transfer to a plate using two utensils to keep the shape.

Those charred bits are full of flavor. Adding a little blue cheese or ranch dressing on the side as a dipper makes it even more delicious.

It can be eaten by cutting with a knife and fork.

                                    OR,

if you're by yourself,  unfurl by strips, dip in sauce ,throw your head back and drop the strips in your mouth. Deeelicious!

                                           *****

I've also roasted broccoli  and brussel sprouts frozen and fresh. The frozen broccoli and brussel sprouts shrink more while roasting than the fresh . Still I'm pleased with the taste.


You may remember the brussel sprouts from

Oven Roasted Parmesan Brussel Sprouts


I've yet to try cauliflower since it isn't one of my favorites, but I'll give it another go.

THAT'S IT***


Monday, February 17, 2020

Oven Roasted Parmesan Brussel Sprouts


Not everybody likes brussel sprouts. I mostly have them steamed. So far I haven't had them in a slaw or fried. Here in the south  we fry just about everything.

I've got to say this alternate form was easy and delicious.


This recipe is from Together As Family

Ingredients

  • 1 1/2 lbs brussel sprouts (trimmed & halved)
  • 2 tablespoons olive oil
  • 1/3 cup parmesan cheese
  • 1 teaspoon garlic powder
  • 1/2 teaspoon salt
  • 1/4 teaspoon pepper

Instructions

  1. Heat oven to 425 degrees. Very lightly spray a cookie sheet with cooking spray.
  2. In a bowl, combine brussel sprouts (that have been halved and ends trimmed) with the remaining ingredients. Toss together to coat all the brussel sprouts.
  3. Spread onto the cookie sheet making sure they are not touching.
  4. Cook for 16-18 minutes. Serve immediately.

I gathered the items and ingredients I'd need. 


Rinse and pat dry before cutting in half. You want ROASTED not STEAMED, I chose not to cut off the ends since they'd already been done. Plus cutting off the ends causes the sprout to unravel into brussel sprout leaves instead of halves. Although, I found out later that those crispy leaves can be mighty tasty.

Here are some of the sprouts halved. It's important to halve them so that the seasoning can get all the way through.

Into this bowl I added all of the ingredients and mixed them with my hands. 


I laid out the sprouts face down on parchment paper making sure they didn't touch. 
Here the sprouts are out of the oven. No, the Parmesan is still white because for one thing it's the cheap kind in the green container and  because I forgot to add it. So, I sprinkled on the Parmesan and ran the whole cookie sheet back into the oven for a few minutes. Turned out great.
No, these aren't burned.  You want your sprouts to have a char on them. Remember me saying the leaves are tasty and crispy?  I found myself examining the sprouts, tearing off the charred leaves and eating them.  I'm assuming it's very similar to the way kale chips turn out. 

This recipe is now in my Favorites file.
That's it***


Wednesday, July 24, 2019

That's a Lye...

based product.


 Making soap the true old-fashioned way using lye is nothing to be sneezed at or toyed with.  Inhaling the fumes can be dangerous and spilling it on your skin can burn.  This isn’t that melt and pour soap you find at Hobby Lobby and Michael’s. This is the real deal.


Directions(left) Soap kit consisted of a plastic mold with lid, tooth picks
for stirring in oils and botanicals and a cloth towel to keep the heat in
once it's ready to cure. 


The owner of Left Hand Soap company   located in Tuscaloosa, Alabama   has a wealth of knowledge about soap making. She’s been in business for over 20 years. The business name comes from her being a southpaw and being the only one in her family who is. 
She watched her grandmother make soap and decided that was what she wanted to do. Most soaps in the past were made using some type of animal tallow. Most often pork or beef.  Unfortunately, Hitler had soap made from humans in the concentration  camps.  

The owner of Left Hand Soap Company uses natural ingredients purchased from local businesses.

ONE-oils, TWO-pitcher used to pour the emulsified soap
into molds, THREE-glass measuring cup containing lye and distilled
water mixture,  4-prepared molds for any remaining soap liquid


The most important thing I learned was ; Do not to pour a substance into lye. Pour the lye slowly into the substance in an open air place. In this case the substance (fat)  was a mixture of coconut oil, castor oil and olive oil. The lye had been mixed with distilled water and prepped before the class. Hence no need to be outside to do this.

The assistant is emulsifying the mixture of oils and lye mixture until it 
has traced.

I found it funny that purchasing the lye in large quantities requires her to have a permit or certification. Why? Lye is used in making an illegal drug (meth).

Essential oils 
Botanicals to stir into soap mixture
We were given a box to put our towel wrapped soap into. It takes 3 days
for the soap to cure. On the right is a sample of the soap Left Hand Soap
Company makes. I tried it and it is an exfoliating soap. 

Soap without all of the preservatives, colorings and fakeness is not that attractive. 

Looks like insects stuck in wax. They're lavender buds. That indentation
comes from taking the lid off of the mold.

Click the links for more information on making soap and what words such as trace and saponification mean.

This was an interesting experience but I'll continue  to buy ready made soap.

That's it ***

Friday, October 19, 2018

I went on a Cooking Spree (11 photos)


Basil from the garden: Before and after.


Presto!- Pesto


What do you do when you buy a bag of SOUR grapes?

Rinse the grapes
 You make Grape Salad.
Halve the grapes so that they can absorb the sweetness you'll be adding.

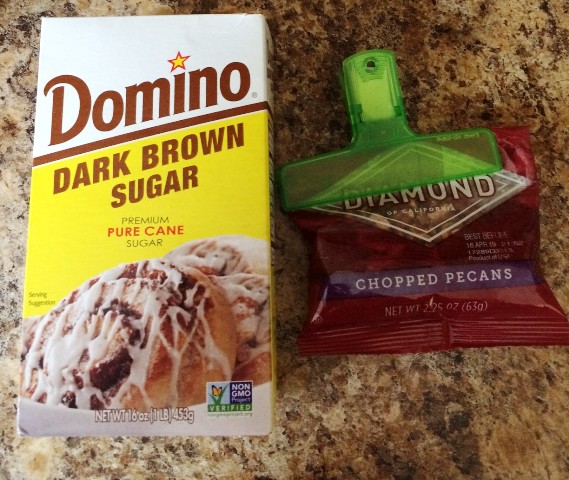
The brown sugar and pecans really dress it up.
 Find a recipe online
The results. Deee-licious

 Miniature eggplant grown in a pot +  one from the farmer's market.


I chose not to peel mine. Rinse and slice about 1/4 of an inch.


Find a recipe for Eggplant Parmesan.

My recipe came from an old cookbook I was given over 35 years ago. But, you can always  go online or ask Alexa.
Here is the Eggplant Parmesan before I put it in the oven.
After pulling it out of the oven. It was delicious.

Squash Casserole
I had so much squash and really got tired of it. But, I would make the casserole, portion it out and freeze it. I used a recipe that my Mom got from one of her friends who was an excellent cook.

*THAT'S  ALL


Tuesday, November 27, 2012

COLLARD CHIPS
 A neighbor gave me a bunch of collards the day before Thanksgiving. I'd recently cooked fresh turnip greens but didn't want the collards to go to waste. I'd heard of kale chips so I thought I'd scout the NET for collard chips. It didn't take long until I found a recipe. One person had described how delicious these vegetable chips are and so I decided to find out for myself.

INGREDIENTS
2-4 collard leaves
1 tsp olive oil (or use olive Misto sprayer)
pinch salt
INSTRUCTIONS
1. Preheat oven to 350 degrees. Line large baking sheet with parchment paper.
2. Prepare collard leaves by washing, patting dry, and removing leaves from stem. Tear leaves with hands into 3-4 inch pieces.


3.Lay in a single layer on parchment paper.  BTW Use of the olive oil was never mentioned anywhere in the recipe. I consulted another recipe which told me to pour and toss the oil over the greens which I did.

4. Bake for seven minutes, then flip leaves. Bake for 5 minutes more, then check leaves. Remove any that are crispy, return any that are limp to the oven. Be careful not to overcook or they will turn brown and bitter.

This is what happens when you put the leaves back in for the addtional 5 minutes.


LET'S TRY THAT ONE MORE TIME AND THIS TIME WATCH IT AND DON'T LET IT BURN


The second batch turned a little brown around the edges but none cooked evenly. I removed them from the oven at this point.

5. Sprinkle collard chips with salt or other preferred seasonings.
6. Serve immediately.

This recipe was a bust. I didn't like the flavor of the"chips" at all. The crisp part mingled with the not so crisp part made for an unpleasant culinary experience. There could have been a mixup with me and the instructions. I disliked this recipe so much that the chance of me trying it again are size zero slim. I am not willing to try an alternative recipe either. There was no real way to evenly cook the leaves. A lower oven temp and placing another sheet of parchment on top of the leaves and flattening them with an ovenproof heavy object to keep them flat might have helped.

I have had good success baking root vegetables such as turnip bottoms,carrots and rutabagas.   Though collards appear thick in their raw form, I think they are too delicate to hold up to the heat in an oven.
I didn't use the entire bunch of collards. Instead I finished cleaning the rest and prepared them in the traditional manner.
THAT'S IT