Friday, August 2, 2013

Squash and Celery Slaw

 Fresh vegetables  are good for you but it's not good to leave them  too long.

This all began when I was baffled as to what to do with leftover celery and squash. Once again, stalking the NET, I came across celery slaw. Since I didn't follow their recipe exactly, I won't put a link to it. I'm  not sure what defines a dish as slaw or salad but I'm  guessing the slaw is shredded.

Sure I could look it up but I'd rather fly by the seat of my pants.
I washed and  scooped out the seeds of  four squash.
Seeded raw squash

Pulp/seeds from squash that I'll use in something else.
 HEY! I had to pay for it. Nothing's going to waste.


Here I've julienned the squash into fine slices.
The Loosely Pulled Together Recipe
Combined  about two cups of  julienned squash with one cup of chopped celery.
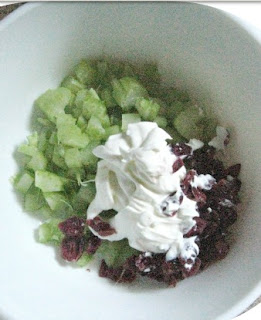
Mixed in  two tablespoons of  dried cranberries and two tablespoons of sour cream, salt and pepper to taste. 


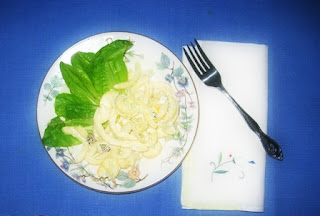
NOTE: Since I failed to take a photo of celery and squash slaw, this photo is of  one I did without the celery.
All in all it was refreshing, different and tasty.


But Wait---There's More...


**********
Celery for Fun
I'd read  somewhere that celery could be regrown from  it's base by putting it in water and then soil, allowing it to resprout from the center into a new stalk.

Tuesday, July 16, 2013

Here We Go Again- More TOMATOES


TOMATOES JAMMIN'

There's nothing like the taste of fresh produce.  I usually get mine at markets that cater to fresh, usually a local Farmer's Market .


 My neighbor gave me a bag of  fresh yellow squash. Also in the bag was a large green tomato. Since my experience cooking fried green tomatoes has not been to my liking I searched for another use for the green tomato. Since I like to try the strange and quirky (tomato ice cream * see post below this one) I found a recipe for Easy Green Tomato JamEasy  was the deciding feature for me.


After chopping and measuring my tomato, I was ¾ of a cup shy of the two cups called for in the recipe. I searched online again to see if there was a recipe that encompassed red and green tomatoes. I came across another recipe for Red Tomato Jam that was almost identical the Green Tomato Jam recipe.
I found my recipes at  Cooks.com


Easy Green Tomato Jam


2 cups chopped green tomatoes and juice (I used a mixture of red and green tomatoes)

2 cups sugar

1 (3oz.) box strawberry jello ( I used mango flavored Jello)

Boil tomatoes and sugar about 12 minutes.

Remove from heat and add Jello. Mix well, untill Jello is melted. Put in ½ pint jars and refrigerate.

One of the good things about this recipe is that it's refrigerated and since I'm making a small quantity there's no need to sterilize the jars nor process the jars in a water bath after they've been filled. Other recipes however did indicate taking the product through the canning method if you're planning to store them for a time.


Tomatoes and sugar cooking.


Adding the mango Jello to tomatoes and sugar mixture.
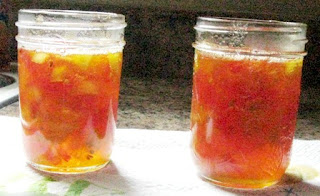

Sterilized pint jars filled with tomato jam. Leave some head space.


Jarred tomato jam  with lids. Will place in fridge to set/congeal. Since this is a refrigerator jam  and there are only two pints a water bath to seal is not necessary.


The final product after a short period of allowing it to congeal a little. (I was anxious to taste it) I have it paired with toasted tortillas that I have broken  into manageable pieces.   I rarely eat sliced bread and cornbread and the tortillas were in the freezer left from an earlier cooking project.
It was very sweet. Too sweet for my taste. The jam  became firmer by the next day. I have paired the jam  with cooked greens and some baked  meats.    The sweetness wasn't as evident this way and was more palatable.
THAT'S  IT***

Tuesday, July 2, 2013

Tomato Ice Cream

TOMATO ICE CREAM
If tomatoes are in the fruit family then they should be ice cream worthy.
tomato ice cream
With there usually being an abundance of tomatoes this time of year experimentation is on the menu. Unique confections abound. Research a few of the flavors Ben and Jerry have concocted. Not everything is a keeper.

Think you've discovered something? Get online and you'll discover you haven't. So it was with the tomato ice cream. I surfed the NET to find a few ideas as to how to go about this unusual flavor.  There weren't that many. Most involved cooking with eggs and so forth. It wasn't something I wanted to attempt. Easy Peasy, that's me. I  decided on a recipe I've used before.

 It was taken from  August 4, 2004 edition of Southern Living magazine. It was developed by Lera Townley of Roanoke, Alabama. Her daughter Wanda Stephens was an Office Manager @ Southern Living. Some of this background info may have changed by now. Below are the ingredients for their vanilla based ice cream.

No-Cook Vanilla Ice Cream
   1 (14 oz) can sweetened condensed milk
   1 (5oz.) can evaporated milk
   2 TBSP sugar
   2 tsp  vanilla
   2 cups whole milk
   ******************************************************
TOMATO ICE CREAM
2 cups seeded tomato puree. (I used 3 med./large fresh tomatoes to make the puree.)

1 (14 oz) can sweetened condensed milk

1 (5oz.) can evaporated milk
2 TBSP sugar
2 tsp vanilla
2 cups whole  Almond milk

BLANCH tomatoes, peel, seed, quarter and puree in blender or food processor. Set aside.


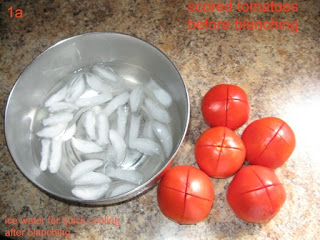
Drop tomatoes in boiling water for about 30-45 seconds. Remove and immediately place in cold water to stop the cooking.


I chose to score the tomatoes on top and bottom to make sure the skin came off easily and it did.


I placed the puree in the fridge so that it could cool even more.

I used a large pitcher for mixing the ingredients. Easier to pour into the ice cream container thingy. 


BC-Before churning

AC-After Churning
The ice cream needs to be cured either in the fridge freezer or packed in the ice cream freezer.

The finished results. It's such a pretty color.

Here you see a sample of the finished results. (That's an air bubble you see not a piece of tomato.)
You're wondering how it tasted. Tastes great.   I was  telling a friend about it. She  hasn't tried it but concluded that as long as you're using sugar, it's got to taste good. NoLa, you're right.
THAT'S IT***


Friday, June 21, 2013

More Keys

Sometimes you TRY something out and then you get on a roll and become addicted. So is the case with the abandoned keys I have around the house. You may remember this one from an earlier post. VeCl saw and admired it so I told her I'd make one for her. I asked what color she'd like and the response was orange. As with a lot of my projects I try to employ more than one method of doing things so that I can see which works the best.
I'm using acrylics, sandpaper and decoupage sealer (not shown).
First I wash and sand the key so it'll have some traction for the paint.  I mixed the orange with some yellow to achieve the right color to match the decorative bits I have in orange below.

I like to dump out what I have in the colors I may use onto a palette (read as: piece of paper), then choose what I want. The shiny cut glass gem was what I decided on.
I painted two keys. These keys have numerous coats of paint. At least three on back, front and sides. One key I painted with the acrylic and one with the glitter paint. The glitter paint didn't cover the surface as well and I ended up painting it orange. NOTE: Future endeavors will have me using a solid base color and then topping with the glitter paint.
 I dipped both keys in decoupage and hung them by a toothpick stuck in a foam block so that they could drip dry. I let it hang for 24 hours.
It gives a great finish. I'm sure I would have gotten an even better finish with Dimensional Magic. It supposedly gives items a resin finish. I didn't have any and I haven't tried it yet so I used what I had.

I placed a few single orange stones down the shaft of the key. Filigree from other jewelry served as leaves on the side. 2 tortoise shell colored beads on a gold elastic cord completes the necklace.
VeCl was very pleased and said she received many compliments.
 I've been asked to display some of these at an arts and crafts show so I guess I'd better get started. I plan to make ten. You will see them in a later post.
That's It***

Monday, June 3, 2013

Mercury Glass

According to Wisegeek.com , mercury glass is a glass with a silvery appearance but contains no mercury. Whew! That’s good to know since buildings and schools have been evacuated  and closed for several days while HAZMAT teams do their thing all because someone dropped a thermometer.


The real mercury glass never contained mercury because it was too expensive to produce and was hazardous. Instead the glass was double walled and infiltrated from the bottom with liquid silver nitrate. For more views of mercury glass you can always visit PINTEREST.


I really like the look of it so I scouted the NET and went to source after source to see how they achieved the faux mercury glass look. 


I bought this heavy bell shaped vase
at a flea market for 75 cents. It measures
10" x 6"

After faux mercury. The light you see is from
the flash of the camera. (Why do bathroom
photos always turn out so great?)

Just as an experiment I decided to silver glaze a sea shell and a wooden knob I had laying around.
The materials I used were Krylon Looking Glass spray paint, half and half  water and vinegar in a mist type sprayer,  You will want to have droplets on your vase or whatever so that the paint will have the distressed look when it dries.
 If there are streaks, that's good too.


Materials needed
 Paper towels or rag to blot with and gloves (optional). 

Once again number 2 photo is MIAI did this project outdoors because I didn't know how noxious the fumes might be.
Tutorials on the WEB were inconsistent as to whether to spray the paint inside of the vase or outside of the vase,   I chose to mist the outside.

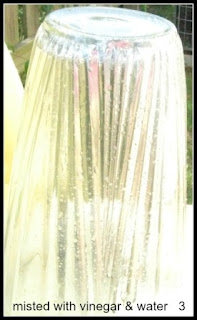
In photo 3 as soon as I misted with water I sprayed the vase lightly with the looking glass paint. 
  • After about 45 seconds I lightly dabbed the area just painted. I did this all the way around the vase, left it outside in the sun for about an hour.
  • I came back after the hour and redid the entire process.

I took this photo outside under the
 shade of the porch after I'd done the
treatment a second time.


Inside of the vase


The shell turned out great but
the wooden knob not so.

Unfortunately great photos by amateur photographers is difficult but the lamps give the vase a  cozy look.
The paint is a little pricey  ($8 for about 5 ounces)  for the teeny bit you get but  after spending 75 cents on the vase, who's complaining?
I will be trying this technique with more glass items.
THAT'S IT***


Thursday, May 30, 2013

Kirigami


While waiting on a luncheon to begin yesterday there was a man in the crowd mingling with others. He had several rectangles of colored paper  about 2'' x 4'' in his shirt pocket that I assumed he used as notepaper.  But I was wrong. He would remove a slip of paper and what appeared to be a swiss army knife from his pocket, which had within it mini scissors, He'd fold the paper and begin to cut.

Paper folded  in quarters
Blogger is in a bad mood today and so I lost additional text I'd written on this post. I usually do my text in WORD and then cut and paste but  I didn't do it this time. Oh well... *&^% Happens.


Sunday, May 12, 2013

Have a Happy Mother's Day

Saturday, May 11, 2013

Mother's Day SUITCASE from the Grandchildren


It's almost semi-officially summer. Getting ready to fly, sail, motor to a road less traveled. For some of those treks an appropriate container is necessary.


Last year I pretty much tore up my traveling suitcase using it to cart my vendor products back and forth to the market.

I bought a new suitcase that claimed 3 pieces. Three pieces are not what they were years ago. Each piece fits within the larger piece. But what do you expect for twenty nine bucks? All of it is pretty generic.

None of it screams, "Mama, get me off the carousel!" when it's unloaded from the plane.

 So in order to distinguish one person's luggage from another, people tie on colorful ribbons, place stickers and a lot of other ingenious ideas. I'd forget what color ribbons I'd put on my luggage or either like someone else's ribbon colors and pick up the wrong suitcase. ( At this point in time I guess it should no longer be referred to as a suitcase. I think those are things of the past. It's just luggage)

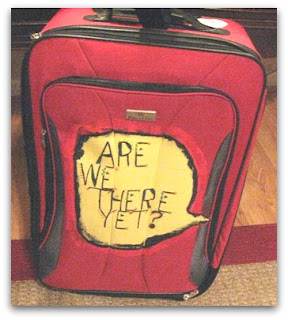
I decided to go a different route with my red, canvas, bag.

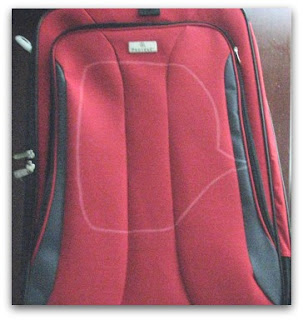
Sharpies are good but don't expect much from a white Sharpie onto a dark fabric.
I had to go over this speech bubble 3 or four times before it was remotely visible.
 Using a white Sharpie I outlined a speech bubble near the zipper of the bag. I was hoping I could fill the entire bubble in white later going back and filling in with black text. That was not to be.


I'd been to several sites to get ideas and instructions. DIY Network

suggested house paint.

Sidebar: While sitting in the waiting room at the opthamologist's,* I was thumbing through the May issue of Family Circle and came across a coupon for a FREE sample of Valspar paint.

I pinched the coupon and felt guilty as my name was being called and confessed to the technician that I'd torn the coupon from the magazine. She forgave me.

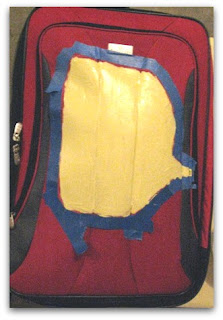
Don't use $ Store tape. It's less tacky and my paint bled underneath it.
Using painter's tape I taped off the areas I didn't want painted (lotta good that did me) and proceeded to paint the speech bubble yellow. The bag was absorbing the paint but not giving good coverage so I added textile medium to the paint as done at the loopylady11BTS tutorial . It still didn't help much. Since the inside of the bag is vinyl (remember it's cheap)  and I'd stuffed it with plastic bags for loft to paint on no paint seeped through.
My humorous take on a stowaway inside the luggage. Hope TSA finds it funny.
 Since the tape didn't really do its job I tried sponge outlining the bubble with black acrylic paint to try and neaten it up. Nada.

 Then I used a square makeup sponge dipped in red acrylic to neaten up the black outside edge of the bubble. Double Nada.

 At this point I  was going to be satisfied with whatever I ended up with. I don't think I will have any problem identifying my suitcase 
luggage.

The text was done with a black Sharpie with highlights using other Sharpie colors.

I'm Ok with it.

If anyone asks, I'll say my grandchildren did it as a Mother's Day gift. They don't need to know that I don't have grandchildren.

*I'm using a larger font while undergoing treatment after complications from cataract surgery. It'll be this way for a while or maybe from now on.     :)

Sunday, May 5, 2013

Spinach Quiche


The foil is to protect the crust edges from overcooking. It was removed after the pie cooled.
 Why is it when you get a recipe right, you forget to take pictures?

I bought 2 bags of fresh spinach for salads. I'd had the second bag awhile and didn't want it to do bad (because that's wasting money)so I decided to do a quiche, something I hadn't had in a long time.

Ingredients were chopped steamed spinach, canned mushrooms, chopped onions, 3 eggs, almond milk, prepared deep dish crust, two types of grated cheese, salt and pepper.

Turned out great.


top view


side view
THAT'S IT***


Monday, April 29, 2013

LIME CAKE

Who could forget the ugly cake? 
I vowed to do better next time with a key lime cake. I became a fan of the key lime cake after attending a church tea and tasting one made from scratch by one of the ladies there. There are some things that can't be duplicated and I didn't even try. I just wanted some semblance of the cake and so I tried again after scouring the NET for EASY key lime cakes. Most of what I found was the 1960's version in which holes are punched in the cake with a toothpick and lime jello is poured on top allowing it to seep into the cake. That wasn't what I was looking for. BUT, I sort of ended up with it anyway. *More about that later.
I used a recipe I found at Fabulessly Frugal .  Of course being me I changed some things.
Here's the general recipe:


This isn't the entire recipe but you get the idea. You measure, mix, stir, etc. etc.


Items used for cake.
I used prepared limeade in place of the water the cake mix called for and lime jello to give it flavor and color.


It has such a pretty color.


This is the cake out of the oven cooling.


I used the sheet cake pan again. You may notice a greenish tinge to the cake.


I took this photo to show BEFORE things could go wrong. I cut a sliver of the unfrosted cake and put whipped topping to the side which I then spread over my cake.. The cake was delicious. It satisfied my desire for key lime cake .


*Experimenting  more I  tried to finagle a topping using lime jello and whipped topping.

The two ingredients


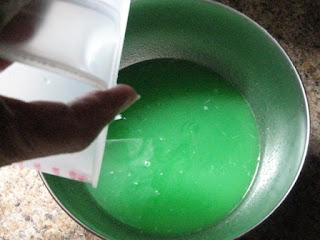
Dissolving and mixing the jello using limeade


I won't show you the results but it was a retro version of the Jello Fluff without the marshmallows.  Showing the results would have made UGLY CAKE #2. The fluff tasted just fine and eventually gelled.  I prefer to leave well enough alone.
THAT'S IT ***