Showing posts with label red. Show all posts

Sunday, December 28, 2025

Recliner Foot Rest Repair


Underside of foot rest.
😃Great condition, but I don't use that side.


Top side of foot rest. Worn from 
roughness and resting shoes on it .

1. Removed the worn part.
2.Underneath, cambric and thin
wood behind it.
 3. Used Gorilla Glue to glue down the loose vinyl.


1.Glued red felt over the cambric and wood .
2. Sewed a new cushion with extra stuffing.  Vinyl was purchased
from Hobby Lobby. NOTE: The new vinyl is better quality than what's on the chair.
3. Using velcro tabs to attach the new footrest cushion.
 
Open

Closed

Though it isn't professionally upholstered, it suits me just fine. The extra stuffing makes it even more comfortable than it originally was. 

That's it***🪑

Saturday, October 31, 2020

Wall Grouping

 It started out with the bicycle picture below hanging above my bed.

But, then I thought it needed a little bit more around it. I searched around the Net for ideas. 


Things changed as they always do when I'm crafting.


 paper clip as a hanger 

Laid it all out on the bed to get an idea

DEcided there was not enough yellow in the original picture.
BEFORE
AFTER
Went around the edges in yellow and added a couple of  flattened, ironed, yellow, silk flowers glued on with Mod Podge.
The final grouping

I'm pleased.
That's it.


Saturday, April 20, 2019

Purse charms/Key rings/ Lanyard


 G. J. and I were in charge of our April Red Hat event. The chapter  usually has a "lovely parting gift" for each person that attends. I told my  event buddy that I'd been working on these, showed  her a sample and we both decided that they would be fine as a gift.

At first it was going to be a pendant on a gold or silver chain. Then I realized some are sensitive to various metals. I didn't want to use ribbon or cord so I had to rethink the project.
💡
A purse charm would be away from the body and it would be less prone to cause sensitivity.

     I painted one side of wooden circles purple for Red Hatters and pink for Pink Hatters. Let it dry. I drilled a hole at the top of each one.
 I painted the back side some form of gold or silver. A  fellow crafter had given me strands of pearls and strands of gold beads which were perfect for this project.  With the beads being on a strand it was much easier to wrap them around the glass bubble picture of each one and slowly pull the string after the beads were in place. I used E-6000 glue for all adherences. 
Pearls in place, Gold beads in place, names on the back, etc. Let it dry.


Now it was time to  do individual beading to make the dangly, thingies that would hang off of the purse charm.
Yep, you're seeing it right. I used an empty egg crate to separate my beads. 

The danglies were then attached to the blank key chains which I purchased from Amazon. 

SIDEBAR: I noticed that some of the key chains had a straight piece of wire in between the groove where the keys go.  Not knowing what it was, I inquired and discovered that it was there to help separate the clip so that the keys could slide on easier. BTW- A staple remover works well also when separating to add keys. No more ruined manicures.

You'll see the results of the dangly, thingies here and below.

The fronts and backs were all finished with at least three coats of Triple Thick. This product gives a glassy, glossy appearance to projects and helps protect them.


They needed some type of packaging and personalization so  I used card stock and personalized everyone's name on their individual purse charm.
This was a fun project and turned out just the way I wanted it to.

That's it ***


Friday, May 18, 2018

Dyed shoes that died (5 photos)


Not all projects turn out the way you want them to as I have shown before. Unlike some, I'm willing to own up to the good and the bad. I rarely become upset because they're all experiments I enjoy undertaking and I don't spend a lot of money on them.

I found these white leather shoes
in a thrift shop. I tried them on and found them comfortable. I disinfected the shoes by wiping them inside with Mr. Clean, drying outside in the sun and spraying with Lysol. 

I thought they'd be great in purple. Why purple?
I'm a member of a Red Hat Society
chapter and the colors are red and purple.

I don't want to spend a lot of money on red and purple, nor wear the same thing all of the time, being that there are numerous "hoots" to attend. 
These are the dyes and colors I tried with no pleasing success.


1. Dye-na-flow- watery and runny.Not really made for this project, but what the heck.


2. Craft Smart acrylic paint-too light and not a smooth cover
A waste of painters tape


3. Folk Art multisurface metallic- 

4. Craft Smart black-
thinking maybe if I prime it with black, it'll cover the white spots and accept the purple metallic better.-
DOUBLE 


5. Rit dye full strength- Another ugh, ugh. watery.

In the end...


  >>>>>>>> 
 
That's it ***

Wednesday, September 21, 2016

Burlap On Stage


Burlap is back.
I got my inspiration from
Poppy Kosh
Manila Extract
and                           here

 I printed my own burlap coffee bag look by pulling up a graphic on the computer and printing it onto burlap. It's important to make sure all of the edges are taped down to avoid the ravels from the burlap yucking up the printer.
When was the last time you saw thread for 59cents? I took a chance using it.  By the way, it was a new spool that had never been opened. I thought it might be rotten after having it for so long but  it worked out fine.

I ironed interfacing to the backs of all pieces
to give it some body.


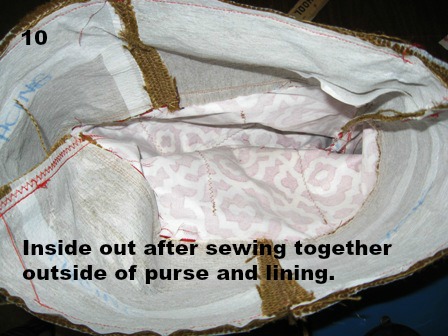
I fused lace onto the two pockets so that they'd be easily seen inside the purse. I sewed one pocket on the front and back inside.


This is the part I was reluctant about.  I've only set grommets once and it was so long ago, I needed a refresher so I contacted YouTube. I don't know what I'd do without it. As stated before, no fabric stores so I got the grommets from Harbor Freight.     


Decided to make a purse charm
Also, I made a slide to go on the bag closing.
Ta Da ! All done.

Overall, This project was more trouble than it was worth. But, it was also a great learning experience.
THAT'S IT***