Showing posts with label hot glue. Show all posts

Tuesday, November 18, 2025

3-D Frame


The Inspirations
Pinterest


The Result
The red bird was made from air dry clay, painted and wired to the branch. 

How I Did It

Brown paper wrapped around wire to make branches. Leaves from air dry clay and painted. Tree made from twisted brown paper, painted and glued to canvas. 

There  are flaws such as the frraming being crooked but, not bad for a first try.

That's it.***


Saturday, December 14, 2024

Mesh Christmas Tree Door Decoration

  I got the idea from Pinterest

Sisak Photo

There were several photos  done by various makers. 


Mine isn't exactly like the Pinterest models and the ornaments are placed "differently" but, who wants to be like everybody else?πŸ™ƒ I'm pleased with the outcome.

That's it πŸŽ„πŸŽ„πŸŽ„
Update  :12/18/2024 


The ornaments are a little more orderly.


Monday, May 20, 2024

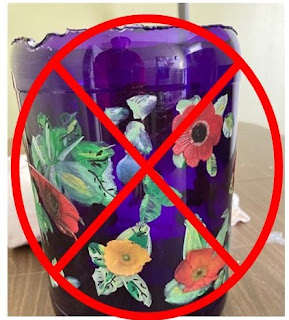
Return of the Pretty Blue Pot-Ugly


I'd previously tried to decorate an azure blue, plastic, container into a decorative pot. Click  here  to see the post.

I decided to  give it another try.
I spray painted the container to cover up my previous painting attempts.


Silicone mold


That's it***


Wednesday, August 31, 2022

SHORTS (2) : melt and pour soap; shower curtain rings


Melt & Pour Soap
One of the local libraries had a melt and pour soap class. I've used the glycerin soap in the past to make my own soaps. I always used food coloring to color the transparent soap. I never used the fancy molds similar to what was used in the class. Still it was fun getting with others and enjoying each others company.

Shower Curtain Rings
Curtain rings doing their duty :28 sec.

That's it 🚿🚿🚿

Wednesday, May 19, 2021

Cobbling a Sprinkler for a Watering Container

 I couldn't find the sprinkler spout so I made my own.


That's it***  


Thursday, July 9, 2020

Woman in a Can

A companion for the Tin Can Man

1. Coffee can, cookie can, tuna can, wire, hot glue
2. I had all of these keys and so I thought I'd make a skirt for 
    Tin Can Woman  (TCW)
3.  Key skirt
4.  Premature Tin Can Woman.


 Back to the drawing board

I used spoons, wire, keys, old jewelry, nuts, bolts, electrical tape, mini Altoid tin, craft chain, discarded man's ring and silver paint.

To give it a uniform look I sprayed it with silver paint.  It also covers up some of the glue. Very pleased with the outcome.
That's it***

Monday, May 25, 2020

Tin Can Man

The Wizard of Oz was always one of my favorite movies as a child. Later in life I learned about all of the rumors, legends and scandal behind the filming of the movie. Some true, false or simply embellished.

For some time I've wanted to make a tin can man. I washed and saved several cans of various sizes. When I had enough I began to construct in my mind how I wanted him to look.

Of course I searched Pinterest and other sites just to get workable information.


I wanted to use bolts to hinge parts together but it was too difficult even trying to use my drill. I probably don't have the correct drill bit.  I used E-6000, HVAC tape and hot glue in areas that were tricky to keep in place. I'm well aware that the glue will melt in hot weather as I expect it to. Hot glue was a temporary measure to keep things in place until the E-6000 had time to cure.


The buttons consist of 2 washers and one bottle cap, The metal heart is a metal icon I had in my
stash. I may paint it red at a later date.

I'm very pleased with the Tin Man's outcome. He's hanging on the wall of my back fence. I look forward to him rusting and gaining more character. 

I may even  put together a companion for him. πŸ˜‰


Wednesday, May 20, 2020

Door Decoration


 I enjoy decorating my front door. It makes a home look inviting.

 I went to my favorite site, Pinterest to get a little inspiration. After perusing the site for burlap baskets and flowers, my idea finally  hatched.

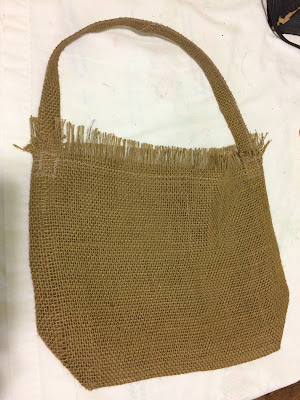
This past Sunday I took  a scrap piece of burlap I had left over from a previous project to make a burlap pouch.


I made sure I ironed it first so that I could even things up. I ran staystitching on all sides because burlap will ravel. Above the staystitching I pulled the threads giving it a fringed look.


I sewed the sides then went across the bottom and made a triangle from the side to the bottom at both side seams. 
(I think it's called a dart. Correct me if I'm wrong.)

After ironing the pouch I made a handle from from burlap too.
You can see where I fringed the top.

Placing the flowers is where a tiny challenge came in. The challenge being that I wanted to be able to use the burlap  pouch  for other things if I chose to. I used a piece of scrap cardboard, wrapped and hot glued the stems in newspaper, then glued that to the box.  I took the baby's breath apart to fill in wherever I wanted.    

The book in the upper right hand corner was my first thought
to use as the base for the flowers. Hollowing out the pages was
a chore. The book is an old Reader's Digest novel compilation
I got at the thrift store.
After gluing the flowers onto the cardboard, I folded the cardboard
 envelope style and stapled the sides.

I tucked the cardboard bunch of flowers into the burlap pouch. The cardboard wasn't stable inside so I added a bit of  hot glue on the back of the cardboard and glued it to the back of the pouch.
This is the back of the pouch. The white is where the hot glue
melded to the paper as I was allowing it to dry. That part won't be
seen.  Though glued, I'll still be able to disconnect the cardboard
if I want to reuse the pouch.
To fill out the pouch, I used crumpled newspaper.

I'm not a florist so the way I have them arranged is in no particular order.  Hanging them on the closet door was a dress rehearsal before hanging them outside. I found a purple dragonfly in my stash from another project and penned him to the outside of the pouch.
Here is the finished product. I'm pleased. For a closer look refer to the picture at the beginning of the post. (If you look even closer you'll see a reflection of me snapping the picture.) πŸ˜€

That's it***

Wednesday, October 4, 2017

Scarecrow Boy Has Lost His Head


 I got so excited with this project that I forgot about taking pictures for each step. There are only 4 pictures.
After mulching my flower bed with pine straw, I had an extra bale left over. What to do? Use it as fall decor. 

CLOTHING-  I went to the Thrift Store and bought a pair of jeans, shirt and tie that would fit a small child. The cost was about $2.?? for the 3 pieces.
I tied  the legs off with string so that the stuffing of plastic bags would stay in place.


BODY- I  used an empty Tide detergent bottle for his front and back. Nice and sturdy. To keep the clothes in place I used  safety pins. Not shown is the burlap oval I put on top where his head should be.


ARMS-This burlap was stenciled by me to resemble a burlap coffee bag. It was left over from a project that didn't  pan out but, being the recycler that I am, I saved it in case I could use it elsewhere. The burlap was hot glued into tubes, then stuffed with plastic bags and the wire. Wire was placed inside the arms to bend them  as desired.


Here he is finished.  I had raffia left over from scarecrow girl which I glued inside his burlap tattooed arms and at the end of his legs. Other than the Tide bottle, everything is stuffed with plastic bags. The flowers and berries were also left over from scarecrow girl. The plastic pumpkin I've had for years. I cut out felt facial expressions and hot glued them onto the pumpkin.  I kept him sitting up by tying a wire coat hanger to his shirt and the straw. The foam pumpkin stays in place with nails I placed inside the underside of the pumpkin then pressed into the straw. 

That's  it