Showing posts with label craft. Show all posts

Wednesday, March 25, 2020

I Tried This

I've had some time on my hands and so decided to try out a few new things.

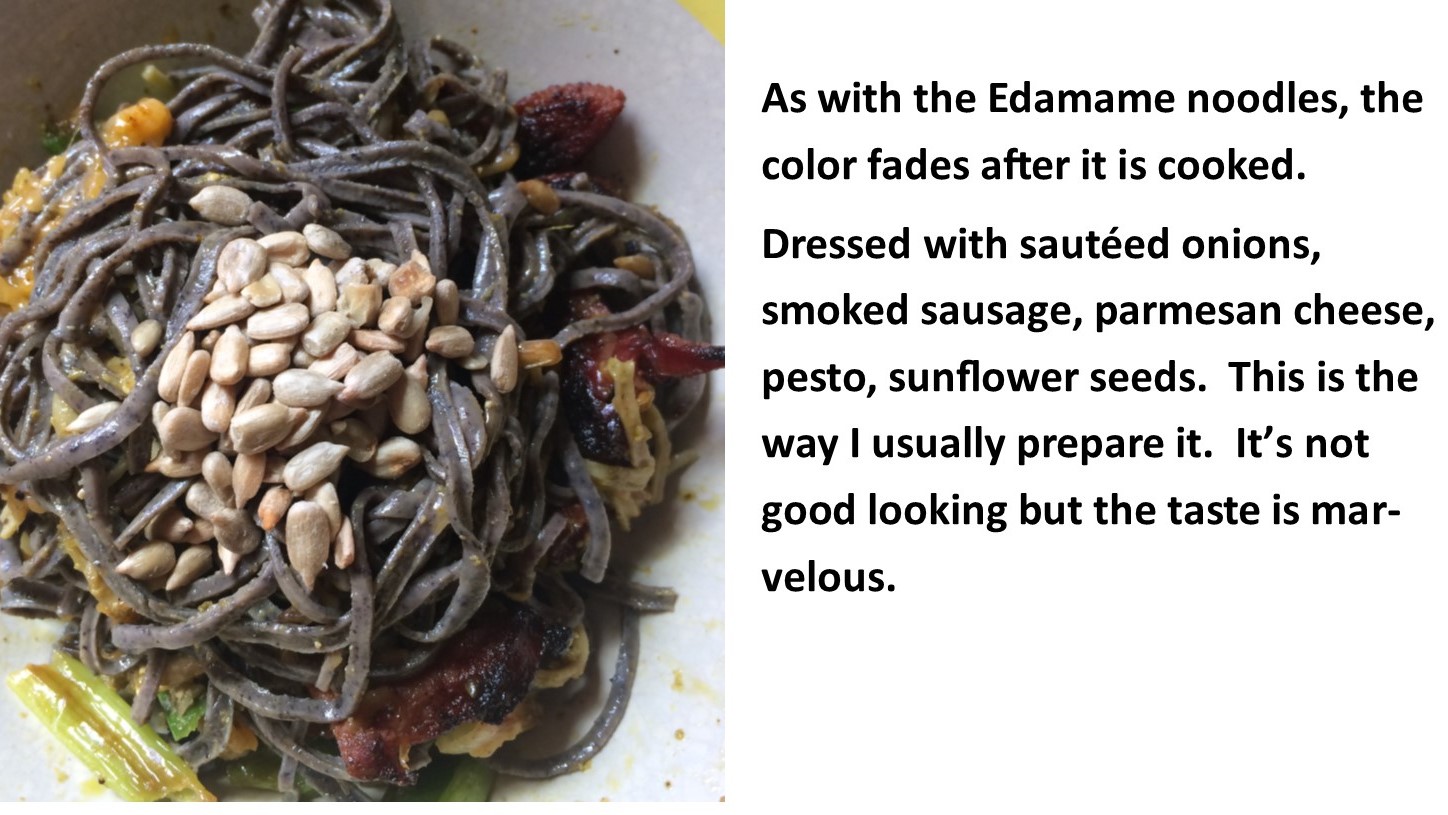
PLANT NOODLES
BUT WAIT, THERE'S MORE!
So far I haven't tried either of these with meatballs and tomato sauce with mozzarella cheese. But it's coming.

MAKING IT EASY

BUTTER ME UP

I had a choice of two butters.


The differences are very slight. The plant butter melted fine on my baked potato and tasted just as delicious as the regular butter.

Coffee Break
CRAFT sort of


Welcoming Spring and it's holidays can be a little difficult when you can't get out to get the craft materials you need and they aren't in your stash.
I'd gotten this plaque from $ Tree before the Pandemic.  Crafting makes me feel better. 
Left - the plaque as I bought it from $ Tree
Right- outlined the eggs with markers. Painted the rabbit, added features and a cowboy hat. Painted the burlap tie yellow and added glitter. Highlighted the greenery. Added a pink jeweled nose. Highlighted the wording, "Happy Easter."
I wanted to add more  because it still looks too plain but this craft fix will have to do for now.

Keeping me company while blogging were these two albums.
That's it***


Thursday, September 5, 2019

Domino Necklace

You know what they say, "Go big or go home."
My going big was to make a Domino necklace just for fun to wear to my first  Seniors Masters Tournament.


  1.  I usually will lay out things I plan to use in a craft project. The Dominoes were only $1 at the Dollar Store.  They measure about 1 1/4 x 1/2 inch. I wrapped the ones I didn't use in the plastic wrap you see and placed them in one of my craft bins. I didn't want them all over the place. I used a drill with a small bit to put holes in the tops of five dominoes. I also got the bit stuck in the drill and can't get it out.☹️ That's another story.
2. Since the pips were varicolored, I used a  white Sharpie to cover them.
3. I took 4 rhinestone sets from the roll of rhinestones (I'd bought it for another project and couldn't use it.) to make the bar between the pips. Individual rhinestones were used for each pip.
4. I decided to use a pearl necklace I'd begun some time ago and a remnant of chain I had for the necklace. 


5. I placed the dominoes in equal places on the pearl portion. 


6.  I measured where I wanted my necklace to fall. I attached the pearl section to the chain with jump rings. Then placed the lobster clasp on the back. 

I was satisfied with the outcome of the necklace. The only thing I had to buy were the dominoes.  I guess you'd say it cost me $1.10. 

That's itπŸ— πŸ• 🁈


Wednesday, April 19, 2017

This Isn't Your Grandma's Button Box

It's been a while since I posted. Had what I consider major PC issues. Had to get a new modem. Then the PC had to be upgraded. Tech ,Tech,Tech.
 Anyway...


Since I enjoy crafts I've been hanging out once a week at one of the city libraries where they have crafts for adults. 
The first I participated in was making pictures with buttons.  
There were buttons of all shapes, colors and compositions. 
First we painted a tree on the canvas mat.
This tree looks a little angry. Maybe it'll cheer up after I decorate it.


We used E-6000 glue and a real canvas mat.  Choosing the buttons wasn't easy with so many choices


Here are some of the ones that were done .

 
Remember the angy looking naked tree at the top? This is how I filled it in.
 That's it***

Monday, October 11, 2010

craft suitcase, planter

I saw a gorgeous flower planter of burlap made by DevilishlyDomestic at etsy.com. What a great environmentally friendly planter.

I decided I wanted to make one. Here it is.
I bought the fabric folded and cut it in a square.

As you can see here I've done a lot of stitching to keep the soil in because it'll be outside and it will need to withstand the elements.


Here I've added the handle so it can hang on the fence.
I cut the slits and place the soil inside. Then the plants.
Here it is on the fence. Mine was not anywhere near as beautiful as DevilishlyDomestic.Glad I did try it though.

UPDATE 8-26-2012 I left it outside on the ground once I was finished with it and it was eaten by insects. Another eco friendly fabric. It returned to the earth.
Trying to pick out your luggage on the carousel at the airport can be a little difficult when it all looks alike. I decided to make mine stand out a bit more.
I made my own stencil by taping off areas with painters tape. I used oil paint crayons. It's a lot neater. Using a stipling brush spreads the paint the way you want. Sort of like dry brushing.
Here is the finished result after coloring in the background. I liked it best without the background filled in but it's too late. There's nothing I can do about that.
THAT'S IT**